Support
Perguntas frequentes
Saiba mais sobre nossos produtos, a escala ISQ e como usá-la, o OsstellConnect,a tecnologia Osstell, e muito mais.
Questions about Smartpegs
Yes, it can be sterilised with a Prion cycle at 134 °C for 18 minutes.
Whether you are using a single-use or a reusable SmartPeg, it should always be installed using the SmartPeg Mount and tightened to approximately 4–6 Ncm – typically described as finger tight. This ensures proper seating and accurate ISQ measurements without risking damage to the implant or the SmartPeg.
Yes. You can mix single-use and reusable SmartPegs during the same treatment session. The only requirement is that you use the correct SmartPeg Type number for the specific implant or abutment you are measuring.
Whether the SmartPeg is single-use or reusable does not affect the measurement.
Yes, as long as its integrity and performance are maintained.
Osstell is also the only company offering both a sterile single-use and a reusable SmartPeg made of aluminium, supported by more than 1,500 published studies on the ISQ method.
With the Osstell original ISQ scale and SmartPegs, no conversion tables or correction factors are needed. The measured ISQ value is the true value, regardless of whether you use a single use or a reusable SmartPeg.
SmartPegs are supplied in different packaging formats depending on whether they are single-use or reusable:
Single-use SmartPegs
- Delivered sterile.
- Supplied in boxes of 5 pieces, in a single sterile barrier system with protective outer packaging.
- Intended for one treatment session only and must not be reused.
Reusable SmartPegs
- Delivered nonsterile in individual packaging.
- Must be cleaned, disinfected and sterilized before the first clinical use and after every subsequent use. (See quickguide at osstell/ifu).
SmartPeg Mount
- Delivered nonsterile with the instrument.
- Can be purchased separately, in package of 5.
- Must also be cleaned, disinfected and sterilized before use and between patients. (See quickguide at osstell/ifu).
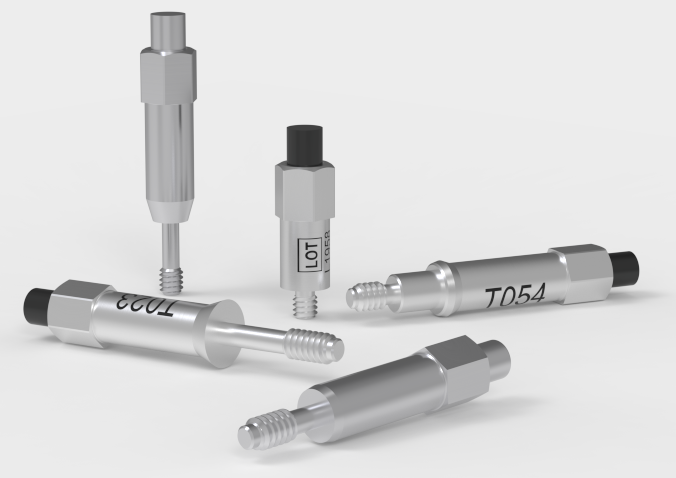
Yes. The reusable and single use SmartPegs are designed so they can be easily distinguished visually:
- The single-use SmartPeg is supplied sterile, has an aluminium coloured (non coloured) magnet, and does not include any laser marked identifiers on the body.
- The reusable SmartPeg has a black magnet on top and carries laser marked Type and LOT numbers on the body for identification and traceability.

The reusable SmartPeg can be used for up to 20 reprocessing cycles, as long as its integrity and performance are maintained.
If inspection reveals wear, deformation, corrosion, damaged threads, or any loss of functional compatibility, the SmartPeg must be discarded, even if it has been processed fewer than 20 times.
The single-use SmartPeg is intended for one treatment session only and must not be reprocessed.
The reusable SmartPeg is engineered with special protective surface coating – one on the SmartPeg body and another black protective coating on the magnet. These coatings provide resistance to moisture, cleaning chemicals, wear, and corrosion, ensuring that the SmartPeg maintains its performance throughout the validated number of reprocessing cycles.
The reusable SmartPeg can easily be distinguished from the single use version: it has a black magnet, and its LOT and Type number are laser marked on the body for clear identification.
Prior to the first clinical use, and after each use the reusable products must be cleaned, disinfected and sterilized according to the instructions in the quickguide that is found here: Osstell/ifu
You can record ISQ at abutment level in OsstellConnect, but it is important to follow the correct clinical measurement procedure to obtain accurate values.
How to measure ISQ at abutment level
- Perform an implant level measurement first, before placing the abutment.
- Measure again at abutment level during the same session, using a SmartPeg made for abutment level measuring.
- Determine the offset by noting the difference between implant level and abutment level ISQ. This offset remains stable throughout healing and should be used when interpreting follow-up measurements.
- For all subsequent visits, measure on the abutment and apply the same offset to understand the true implant ISQ.
How to record the measurement in OsstellConnect:
- Go to the patient’s record, select the patient and the implant in the tooth chart. Click ‘Add abutment’, choose the abutment, and save.
- Select ‘Measure stability’ and choose ‘Abutment’ under Measurement level. Measure on the abutment as you would at implant level and save.
- To review the stability trend, open the Stability tab and toggle ‘Show abutment’. You can also enable ‘Show details’ to view buccal–lingual and mesial–distal ISQ values.
For a more detailed explanation and clinical guidance, see our blog post here.
ISQ should always be measured in two directions, because implant stability can vary depending on the amount of surrounding bone in different directions. Measuring from two angles ensures that both the most and the least stable directions are captured.
To do this, take one measurement in the buccal-lingual direction and one in the mesial-distal direction. These two ISQ values represent the different stability directions. Sometimes the values are identical; sometimes they differ.
If the two measurements differ, always rely on the lowest ISQ value, as it reflects the weakest direction and therefore provides the most clinically relevant information about implant stability.
No. A torque device should not be used to tighten the SmartPeg.
SmartPegs should always be mounted using the SmartPeg Mount and tightened to approximately 4–6 Ncm, which is typically described as finger tight.
This ensures the SmartPeg is seated correctly without risking damage to the implant connection.
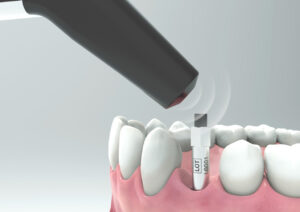
Osstell measures implant stability using Resonance Frequency Analysis (RFA). The small SmartPeg that you attach to the implant has a tiny magnet on top. When the probe sends magnetic pulses, the SmartPeg starts to vibrate – similar to a very small tuning fork.
How it works:
- The probe sends magnetic pulses
These pulses make the SmartPeg vibrate without touching it. - The vibration changes depending on how stable the implant is
– A stable implant (good bone support) makes the SmartPeg vibrate faster.
– A less stable implant makes it vibrate slower. - The device converts this vibration into an ISQ value
– Higher stability → higher frequency → higher ISQ
– Lower stability → lower frequency → lower ISQ
It takes less than a second, and the ISQ value is shown immediately.
Yes. The ISQ value can be affected if the SmartPeg is not mounted correctly.
For accurate measurements, the SmartPeg should be attached finger tight using the SmartPeg Mount, which corresponds to about 4–6 Ncm.
At this level, the SmartPeg has firm, stable contact with the implant, and the resulting ISQ value is consistent – typically within ±2 ISQ units.
- If the SmartPeg is not fully seated:
The contact becomes unstable, and the ISQ value can appear artificially low, or you don’t receive any value. - If too much force is applied:
Overtightening does not improve accuracy. It may damage the SmartPeg threads.
– A reusable SmartPeg may be damaged so it cannot be used again.
– A single use or reusable SmartPeg may have its threads deformed, which can lead to inaccurate measurements during that session or, in worst case a broken SmartPeg.
In short: finger tight (4–5 Ncm) is enough to ensure stable contact and reliable ISQ readings.
If no ISQ value appears, it usually means the SmartPeg’s vibration is not being detected clearly by the instrument. Several factors can cause this, and most are easy to resolve:
- Distance to instrument is too great
The instrument should normally be held 2–4 mm from the magnet on top of the SmartPeg. Do not touch the magnet. If no value appears, move the instrument closer until the signal is detected. - Angle needs adjustment
The magnetic field is directional, so the orientation of the instrument matters. Measurements should be taken at approximately a 45° angle relative to the top of the SmartPeg. - Ensure you have the correct SmartPeg Type for the specific implant
Use this link to find the correct SmartPeg Type: Find my SmartPeg - Soft tissue damping
Surrounding tissue can sometimes dampen the vibration more than expected. Holding the instrument a bit closer usually compensates for this. - The implant platform is not clean
Ensure the implant platform is clean and free of debris, so the SmartPeg seats properly and transmits its vibration. - The SmartPeg is worn or damaged
• If you are using a reusable SmartPeg, make sure it has been inspected before use and that it is within 20 reprocessing cycles. A reusable SmartPeg that is worn out, bent, or has damaged threads will not vibrate correctly — and the instrument may not be able to pick up a reading.
• A single‑use SmartPeg is intended for one treatment session only.
• Ensure the SmartPeg is properly seated on the implant and that it is not in contact with surrounding tissue, as this can prevent accurate signal detection and may result in no ISQ value or an incorrect one. - Electromagnetic interference
Strong electromagnetic noise sources nearby may disturb the measurement. (See the FAQ on “Electromagnetic noise” for details.)
The following products may be autoclaved (over-pressurized steam up to 135 deg Celsius):
- SmartPeg Mount
- Reusable SmartPeg
- Probe (IDx)
Please note that single-use SmartPegs are disposable and cannot be autoclaved!
You can check the SmartPeg Reference Guide by clicking here
Questions about the Osstell Beacon
Antes de cada uso, umedeça uma gaze ou pano macio com um produto de limpeza de superfícies recomendado (veja a lista abaixo) e limpe todo o instrumento.
Produtos de limpeza aceitáveis:
- Álcool isopropílico 70%
- Detergentes enzimáticos com baixo poder de espuma e pH neutro, tais como:
- BePro Disinfectant Wipes, REF 19500102, www.wh.com (pode ser encomendado à W&H Sterilization)
- Medizime LF
- Enzol
Não use:
- Produtos de limpeza/desinfetantes à base de ácidos ou fenólicos
- Detergentes alcalinos fortes de qualquer tipo, incluindo sabonetes para as mãos e detergentes para louça
- Produtos de limpeza à base de lixívia
- Produtos de limpeza à base de peróxido de hidrogênio
- Produtos de limpeza abrasivos
- Produtos de limpeza à base de acetona ou hidrocarbonetos
- MEK (Metil Etil Cetona)
- Birex
- Glutaraldeído
- Produtos de limpeza à base de sal de cloreto de amônio quaternário
O instrumento não requer manutenção regular. Em caso de mau funcionamento do instrumento, entre em contato com o representante de vendas ou distribuidor local para obter mais instruções.
You can record ISQ at abutment level in OsstellConnect, but it is important to follow the correct clinical measurement procedure to obtain accurate values.
How to measure ISQ at abutment level
- Perform an implant level measurement first, before placing the abutment.
- Measure again at abutment level during the same session, using a SmartPeg made for abutment level measuring.
- Determine the offset by noting the difference between implant level and abutment level ISQ. This offset remains stable throughout healing and should be used when interpreting follow-up measurements.
- For all subsequent visits, measure on the abutment and apply the same offset to understand the true implant ISQ.
How to record the measurement in OsstellConnect:
- Go to the patient’s record, select the patient and the implant in the tooth chart. Click ‘Add abutment’, choose the abutment, and save.
- Select ‘Measure stability’ and choose ‘Abutment’ under Measurement level. Measure on the abutment as you would at implant level and save.
- To review the stability trend, open the Stability tab and toggle ‘Show abutment’. You can also enable ‘Show details’ to view buccal–lingual and mesial–distal ISQ values.
For a more detailed explanation and clinical guidance, see our blog post here.
You can find the serial number on the back of your instrument.
Although it is possible to use the Osstell Beacon directly, depending on the status of the built-in rechargeable battery, it is recommended to charge the battery for at least 3 hours before using the Osstell Beacon instrument.
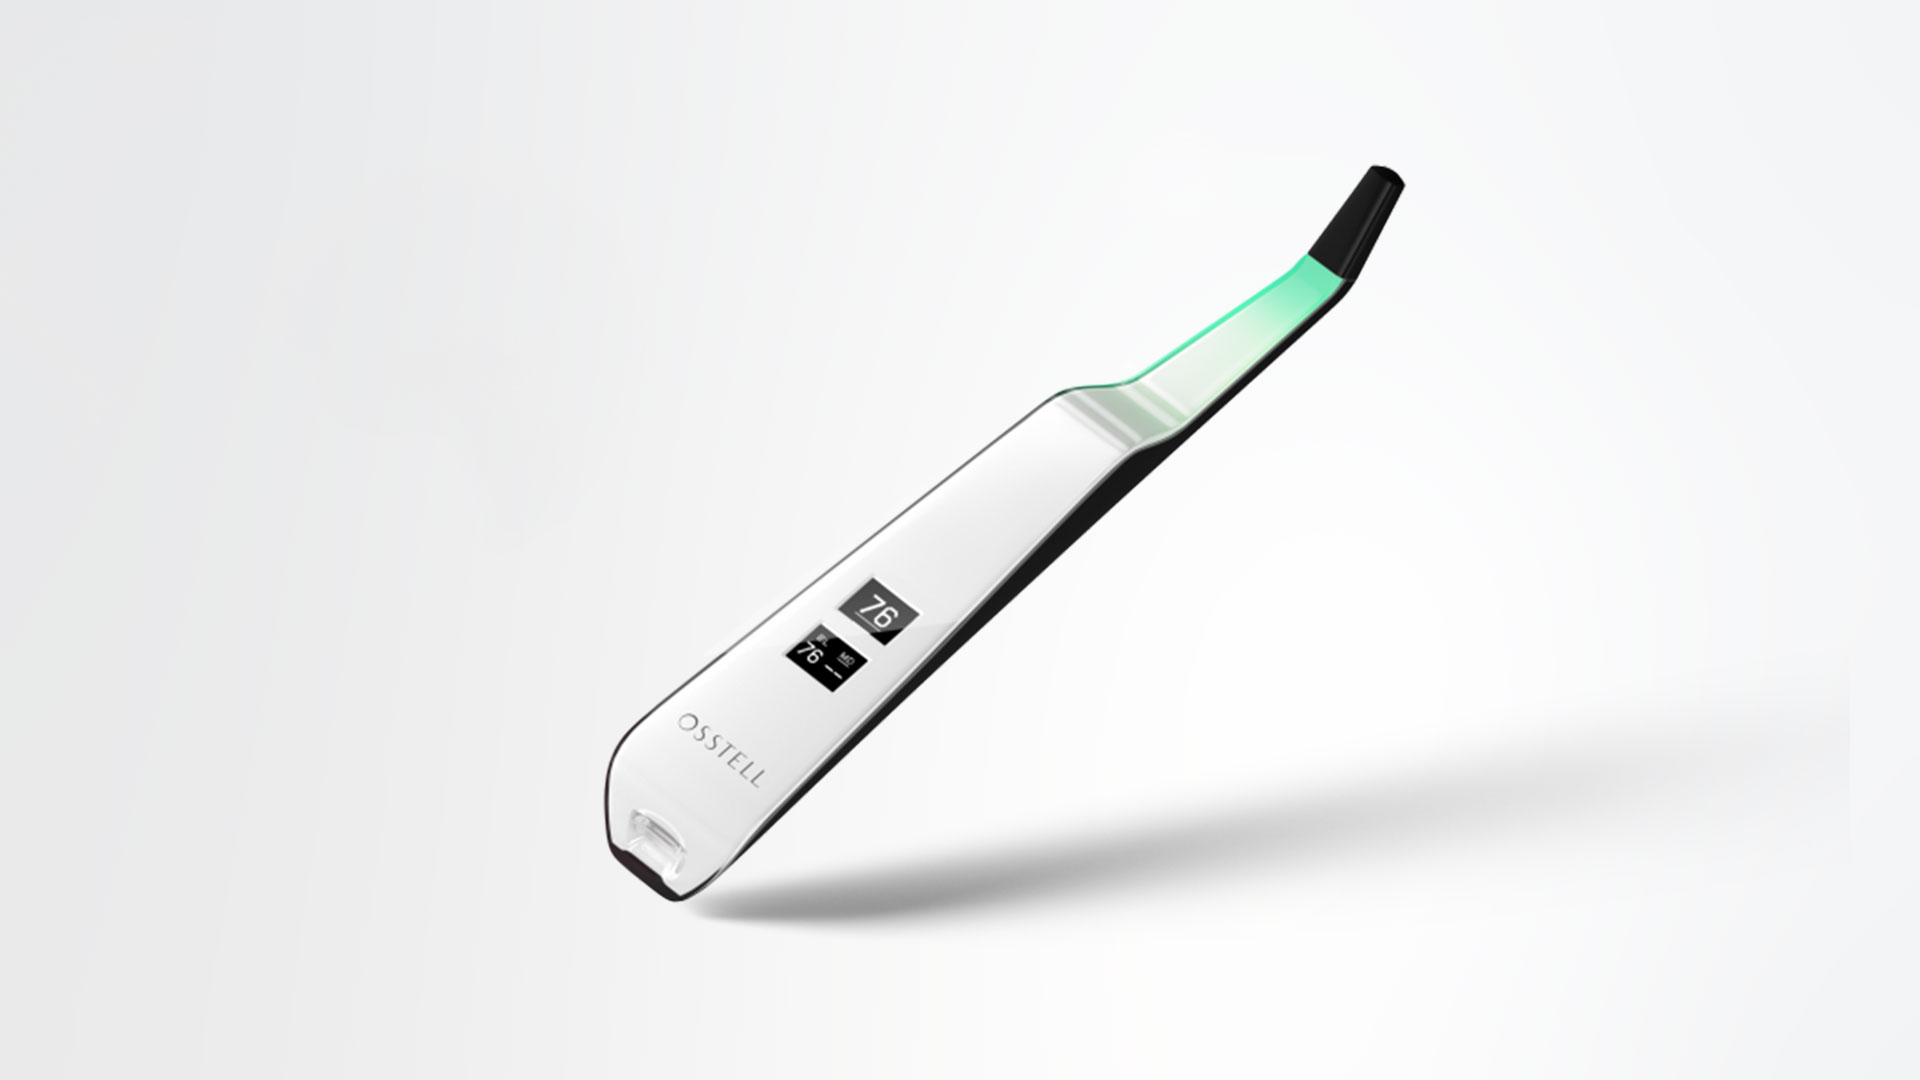
The Osstell Beacon is activated by a built-in motion sensor. As soon as the motion sensor detects movement, the Osstell Beacon will start-up and shortly show battery status and then be ready for measurement in the BL (Buccal – Lingual) direction, which is indicated in the upper display.
The Osstell Beacon will start to measure, indicated by an audible sound, when near an Osstell SmartPeg or Test peg due to a built-in magnetic detector that senses the magnet on the top of the Osstell SmartPeg/TestPeg. Measured data will be shown in the upper display combined with a colored light indication below the tip.
The red, yellow and green color indicates if the measured ISQ value corresponds to a low, medium or high implant stability according to the ISQ scale guidance, click here for more information.
After 60 seconds of no motion, the Osstell Beacon will turn off automatically.
1. Activate the Osstell Beacon by picking it up. The instrument will start-up and after showing the battery status, the instrument will be ready for measurement in the BL (Buccal – Lingual) direction, which is prompted in the upper display as well as optimal angle towards the Smartpeg.
2. Place a barrier sleeve over the Osstell beacon instrument.
3. Place the SmartPeg into the SmartPeg Mount. The SmartPeg is magnetic, and the SmartPeg Mount will hold the SmartPeg. See fig 2. Attach the SmartPeg to the implant or abutment by screwing the SmartPeg Mount using finger force of approximately 4-6 Ncm. Do not over-tighten, to avoid damaging the SmartPeg threads.
4. Hold the instrument tip close (2-4mm) to the top of the SmartPeg without touching it. Sometimes, you will need to go as close as 1 mm. An audible sound indicates when measurement has started, and measured data will be shown in the upper display combined with a colored light indication below the tip.
5. Bring the instrument out of the mouth to clearly read the ISQ value and the colored indication. The measured ISQ values will be displayed in the upper display for a couple of seconds and then switch to be ready for measurement in mesial-distal direction.
6. Repeat step 4 and the sequence starts over and the Osstell Beacon is ready for measurement in the BL (Buccal- Lingual) direction again.
7. When all measurements are performed, remove the SmartPeg by using the SmartPeg Mount. The instrument is automatically turned off after 60 seconds of inactivity.
Watch video on how to measure here.
As explicações possíveis incluem:
SmartPeg reutilizado: Os SmartPegs são descartáveis e devem ser usados somente para uma ou várias medições em uma única sessão de tratamento, apenas para um único paciente. A reutilização repetida pode resultar em leituras falsas devido ao desgaste das roscas de alumínio macio do SmartPeg.
Tipo de SmartPeg selecionado incorreto para o implante: Veja a lista de referências do SmartPeg, osstell.com/smartpegguide
Osso ou tecido mole entre o SmartPeg e o implante: Certifique-se de limpar a conexão protética do implante antes de fixar o SmartPeg.
Interferência eletromagnética: Remova a fonte de interferência eletromagnética.
A sonda está muito afastada do SmartPeg: Mantenha a sonda a uma distância de 2 a 4 mm do SmartPeg.
Although it is possible to use the Osstell Beacon directly, depending on the status of the built-in rechargeable battery, it is recommended to charge the battery for at least 3 hours before using the Osstell Beacon instrument.
The Osstell Beacon is activated by a built-in motion sensor. As soon as the motion sensor detects movement, the Osstell Beacon will start-up and shortly show battery status and then be ready for measurement in the BL (Buccal – Lingual) direction, which is indicated in the upper display.
The Osstell Beacon will start to measure, indicated by an audible sound, when near an Osstell SmartPeg or Test peg due to a built-in magnetic detector that senses the magnet on the top of the Osstell SmartPeg/TestPeg. Measured data will be shown in the upper display combined with a colored light indication below the tip.
The red, yellow and green color indicates if the measured ISQ value corresponds to a low, medium or high implant stability according to the ISQ scale guidance, click here for more information.
After 60 seconds of no motion, the Osstell Beacon will turn off automatically.
1. Activate the Osstell Beacon by picking it up. The instrument will start-up and after showing the battery status, the instrument will be ready for measurement in the BL (Buccal – Lingual) direction, which is prompted in the upper display as well as optimal angle towards the Smartpeg.
2. Place a barrier sleeve over the Osstell beacon instrument.
3. Place the SmartPeg into the SmartPeg Mount. The SmartPeg is magnetic, and the SmartPeg Mount will hold the SmartPeg. See fig 2. Attach the SmartPeg to the implant or abutment by screwing the SmartPeg Mount using finger force of approximately 4-6 Ncm. Do not over-tighten, to avoid damaging the SmartPeg threads.
4. Hold the instrument tip close (2-4mm) to the top of the SmartPeg without touching it. Sometimes, you will need to go as close as 1 mm. An audible sound indicates when measurement has started, and measured data will be shown in the upper display combined with a colored light indication below the tip.
5. Bring the instrument out of the mouth to clearly read the ISQ value and the colored indication. The measured ISQ values will be displayed in the upper display for a couple of seconds and then switch to be ready for measurement in mesial-distal direction.
6. Repeat step 4 and the sequence starts over and the Osstell Beacon is ready for measurement in the BL (Buccal- Lingual) direction again.
7. When all measurements are performed, remove the SmartPeg by using the SmartPeg Mount. The instrument is automatically turned off after 60 seconds of inactivity.
Possible explanations include:
Re-Used SmartPeg: The SmartPegs are disposable and should only be used for one or multiple measurement at one treatment session, for a single patient only. Repeated re-use may result in false readings due to wear and tear of the soft aluminum SmartPeg threads.
Wrong SmartPeg type selected for the implant: See SmartPeg reference list, osstell.com/smartpegguide
Bone or soft tissue in between SmartPeg and Implant: Make sure to clean the Implant prosthetic connection before attaching the SmartPeg.
Electromagnetic interference: Remove the source of electromagnetic interference.
Probe is held too far away from the SmartPeg: Hold the probe 2-4 mm away from the SmartPeg.
You can have your Osstell Beacon online connected to OsstellConnect for data collection, but it is not a requirement. OsstellConnect is an online tool for statistical analysis and valuable insights based on your data. Before you can start using data connection to OsstellConnect you have to register your Osstell Beacon. The serial number can be found on the back of the instrument. For registration assistance and features of data connection to OsstellConnect, please visit osstellconnect.com/beacon
2 years
Before each use, moisten a gauze or soft cloth with an acceptable (see list below) surface disinfectant and wipe the whole Osstell Beacon instrument. Note! Do not autoclave the Osstell Beacon instrument. Routinely check the surface of the instrument tip and overall surface for possible cracks and resins.
Acceptable Cleaners:
o Isopropyl alcohol
o Ethyl alcohol-based cleaners
Do not use:
o Strong alkali detergent of any type, including hand soaps and dish soaps Bleach based cleaners
o Hydrogen Peroxide based cleaners Abrasive Cleansers
o Acetone or hydrocarbon based cleaners MEK (Methyl Ethyl Ketone)
o Birex Gluteraldehyde
o Quaternary Ammonium Chloride salt-based cleaners
The Osstell Beacon is delivered from factory in a “transport” mode, where the built-in motion sensor is deactivated. To deactivate the transport mode and start charging, connect the small USB connector of the Osstell USB cable to wide end of the instrument. Connect the large USB connector to a standard USB outlet of a PC, laptop or charger.
Charge the Beacon for at least 30 min in room temperature, then try again. If the error remains, try resetting the device by:
1. Identify the Beacon reset pin on the picture below.

![]()
2. With a paper clip, do a gentle press for 1 second on the reset button (Note! You may have to tilt the pin a little downwards).
If you see a “PadLock” symbol in the upper display, press one more time on the reset button.
If the Beacon still doesn’t start or the display is showing a wrench and a manual, then please contact your local sales representative or distributor or support@osstell.com.
No, the Osstell Beacon does not require a WiFi connection to be used.
It can connect wirelessly to OsstellConnect via RF, allowing you to store measurements, track ISQ trends and gain clinical insights, but this is optional.
The Osstell Beacon has a 2-year warranty. The W&H Osstell Classic has a 1-year warranty.
The Osstell Beacon is delivered in transport mode, where the motion sensor is disabled.
To switch between transport mode and active mode, briefly connect the USB cable to the instrument to initiate charging, then disconnect it again.
Charge the Beacon for at least 30 min in room temperature, then try again. If the error remains, try resetting the device by:
- Locate the reset hole (see image below).
![]()
2. With a paper clip, do a gentle press for 1 second on the reset button (Note! You may have to tilt the pin a little downwards).
If you see a “PadLock” symbol in the upper display, press one more time on the reset button.
If the Beacon still doesn’t start or the display is showing a wrench and a manual, then please contact your local sales representative or distributor or support@osstell.com.
ISQ should always be measured in two directions, because implant stability can vary depending on the amount of surrounding bone in different directions. Measuring from two angles ensures that both the most and the least stable directions are captured.
To do this, take one measurement in the buccal-lingual direction and one in the mesial-distal direction. These two ISQ values represent the different stability directions. Sometimes the values are identical; sometimes they differ.
If the two measurements differ, always rely on the lowest ISQ value, as it reflects the weakest direction and therefore provides the most clinically relevant information about implant stability.
There are currently thousands of articles where Osstell was used in the study, published in scientific papers. These abstracts could be found in our searchable database under “Resources/Scientific database“.
Osstell measures implant stability using Resonance Frequency Analysis (RFA). The small SmartPeg that you attach to the implant has a tiny magnet on top. When the probe sends magnetic pulses, the SmartPeg starts to vibrate – similar to a very small tuning fork.
How it works:
- The probe sends magnetic pulses
These pulses make the SmartPeg vibrate without touching it. - The vibration changes depending on how stable the implant is
– A stable implant (good bone support) makes the SmartPeg vibrate faster.
– A less stable implant makes it vibrate slower. - The device converts this vibration into an ISQ value
– Higher stability → higher frequency → higher ISQ
– Lower stability → lower frequency → lower ISQ
It takes less than a second, and the ISQ value is shown immediately.
If no ISQ value appears, it usually means the SmartPeg’s vibration is not being detected clearly by the instrument. Several factors can cause this, and most are easy to resolve:
- Distance to instrument is too great
The instrument should normally be held 2–4 mm from the magnet on top of the SmartPeg. Do not touch the magnet. If no value appears, move the instrument closer until the signal is detected. - Angle needs adjustment
The magnetic field is directional, so the orientation of the instrument matters. Measurements should be taken at approximately a 45° angle relative to the top of the SmartPeg. - Ensure you have the correct SmartPeg Type for the specific implant
Use this link to find the correct SmartPeg Type: Find my SmartPeg - Soft tissue damping
Surrounding tissue can sometimes dampen the vibration more than expected. Holding the instrument a bit closer usually compensates for this. - The implant platform is not clean
Ensure the implant platform is clean and free of debris, so the SmartPeg seats properly and transmits its vibration. - The SmartPeg is worn or damaged
• If you are using a reusable SmartPeg, make sure it has been inspected before use and that it is within 20 reprocessing cycles. A reusable SmartPeg that is worn out, bent, or has damaged threads will not vibrate correctly — and the instrument may not be able to pick up a reading.
• A single‑use SmartPeg is intended for one treatment session only.
• Ensure the SmartPeg is properly seated on the implant and that it is not in contact with surrounding tissue, as this can prevent accurate signal detection and may result in no ISQ value or an incorrect one. - Electromagnetic interference
Strong electromagnetic noise sources nearby may disturb the measurement. (See the FAQ on “Electromagnetic noise” for details.)
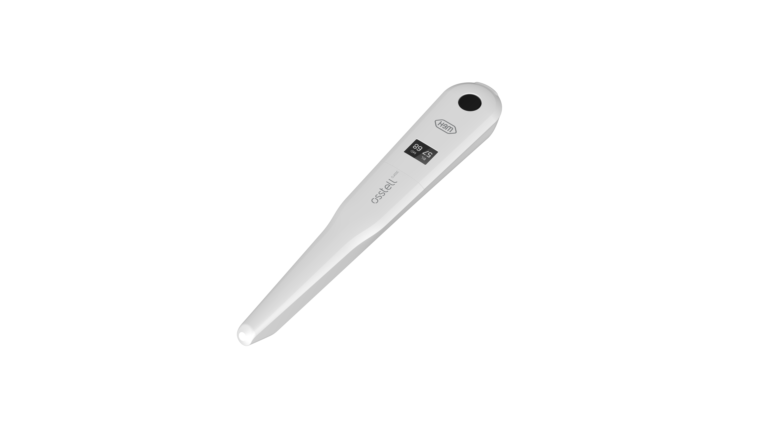
No. The Osstell measurement does not affect the implant. The instrument only makes the SmartPeg vibrate. The SmartPeg’s magnet is activated by very low energy magnetic pulses generated by the instrument. The technique is objective, gentle, and highly repeatable
Yes, ISQ measurements with Osstell’s instruments can be performed on patients with a pacemaker.
As a precaution, the probe should be kept away from the chest area where the pacemaker is located, due to the magnetic pulses emitted during measurement.
There are published reports regarding pacemakers and magnetic fields for further reference. For example, this report.
Measure at implant placement and again before the final restoration to monitor the development of osseointegration. If the ISQ value is not high enough it is advised to add time and remeasure before proceeding with the prosthetic rehabilitation of the implant.
Perguntas sobre o Osstell Classic
Antes de usar em um paciente, coloque uma luva de barreira sobre o instrumento. A luva de barreira ajuda a prevenir a contaminação cruzada e ajuda a evitar que o material composto dentário adira à superfície da ponta e do corpo do instrumento, e também a descoloração e degradação das soluções de limpeza.
Nota
- As luvas de barreira são para uso em um único paciente.
- Descarte as luvas de barreira usadas no lixo comum após cada paciente.
- Não deixe as luvas de barreira no instrumento por períodos prolongados.
- Veja abaixo as luvas de barreira recomendadas.
- TIDIShield, Nº de art.: 20808, Nº de art.: 20987. tidiproducts.com
- PremiumPlus: Luva para sensor de raios X 183-2, tamanho 2
- O instrumento deve ser limpo com agentes adequados após cada paciente.
- Deve ser feita uma primeira medição na colocação do implante para obter uma base para medições futuras ao longo do processo de cicatrização. Antes da restauração final, é realizada outra medição que permite observar a evolução da estabilidade do implante.
- Recomenda-se medir nos sentidos bucal-lingual e mesial-distal para encontrar a menor estabilidade. Portanto, o instrumento solicita ao usuário que faça a medição em ambos os sentidos.
- Clique aqui para ver um vídeo sobre como fazer a medição.
1 ano.
Antes de cada uso, umedeça uma gaze ou pano macio com um produto de limpeza de superfícies recomendado (veja a lista abaixo) e limpe todo o instrumento.
Produtos de limpeza aceitáveis:
- Álcool isopropílico 70%
- Detergentes enzimáticos com baixo poder de espuma e pH neutro, tais como:
- BePro Disinfectant Wipes, REF 19500102, www.wh.com (pode ser encomendado à W&H Sterilization)
- Medizime LF
- Enzol
Não use:
- Produtos de limpeza/desinfetantes à base de ácidos ou fenólicos
- Detergentes alcalinos fortes de qualquer tipo, incluindo sabonetes para as mãos e detergentes para louça
- Produtos de limpeza à base de lixívia
- Produtos de limpeza à base de peróxido de hidrogênio
- Produtos de limpeza abrasivos
- Produtos de limpeza à base de acetona ou hidrocarbonetos
- MEK (Metil Etil Cetona)
- Birex
- Glutaraldeído
- Produtos de limpeza à base de sal de cloreto de amônio quaternário
O instrumento não requer manutenção regular. Em caso de mau funcionamento do instrumento, entre em contato com o representante de vendas ou distribuidor local para obter mais instruções.
You can record ISQ at abutment level in OsstellConnect, but it is important to follow the correct clinical measurement procedure to obtain accurate values.
How to measure ISQ at abutment level
- Perform an implant level measurement first, before placing the abutment.
- Measure again at abutment level during the same session, using a SmartPeg made for abutment level measuring.
- Determine the offset by noting the difference between implant level and abutment level ISQ. This offset remains stable throughout healing and should be used when interpreting follow-up measurements.
- For all subsequent visits, measure on the abutment and apply the same offset to understand the true implant ISQ.
How to record the measurement in OsstellConnect:
- Go to the patient’s record, select the patient and the implant in the tooth chart. Click ‘Add abutment’, choose the abutment, and save.
- Select ‘Measure stability’ and choose ‘Abutment’ under Measurement level. Measure on the abutment as you would at implant level and save.
- To review the stability trend, open the Stability tab and toggle ‘Show abutment’. You can also enable ‘Show details’ to view buccal–lingual and mesial–distal ISQ values.
For a more detailed explanation and clinical guidance, see our blog post here.
You can find the serial number on the back of your instrument.
As explicações possíveis incluem:
SmartPeg reutilizado: Os SmartPegs são descartáveis e devem ser usados somente para uma ou várias medições em uma única sessão de tratamento, apenas para um único paciente. A reutilização repetida pode resultar em leituras falsas devido ao desgaste das roscas de alumínio macio do SmartPeg.
Tipo de SmartPeg selecionado incorreto para o implante: Veja a lista de referências do SmartPeg, osstell.com/smartpegguide
Osso ou tecido mole entre o SmartPeg e o implante: Certifique-se de limpar a conexão protética do implante antes de fixar o SmartPeg.
Interferência eletromagnética: Remova a fonte de interferência eletromagnética.
A sonda está muito afastada do SmartPeg: Mantenha a sonda a uma distância de 2 a 4 mm do SmartPeg.
The Osstell Beacon has a 2-year warranty. The W&H Osstell Classic has a 1-year warranty.
ISQ should always be measured in two directions, because implant stability can vary depending on the amount of surrounding bone in different directions. Measuring from two angles ensures that both the most and the least stable directions are captured.
To do this, take one measurement in the buccal-lingual direction and one in the mesial-distal direction. These two ISQ values represent the different stability directions. Sometimes the values are identical; sometimes they differ.
If the two measurements differ, always rely on the lowest ISQ value, as it reflects the weakest direction and therefore provides the most clinically relevant information about implant stability.
There are currently thousands of articles where Osstell was used in the study, published in scientific papers. These abstracts could be found in our searchable database under “Resources/Scientific database“.
Osstell measures implant stability using Resonance Frequency Analysis (RFA). The small SmartPeg that you attach to the implant has a tiny magnet on top. When the probe sends magnetic pulses, the SmartPeg starts to vibrate – similar to a very small tuning fork.
How it works:
- The probe sends magnetic pulses
These pulses make the SmartPeg vibrate without touching it. - The vibration changes depending on how stable the implant is
– A stable implant (good bone support) makes the SmartPeg vibrate faster.
– A less stable implant makes it vibrate slower. - The device converts this vibration into an ISQ value
– Higher stability → higher frequency → higher ISQ
– Lower stability → lower frequency → lower ISQ
It takes less than a second, and the ISQ value is shown immediately.
If no ISQ value appears, it usually means the SmartPeg’s vibration is not being detected clearly by the instrument. Several factors can cause this, and most are easy to resolve:
- Distance to instrument is too great
The instrument should normally be held 2–4 mm from the magnet on top of the SmartPeg. Do not touch the magnet. If no value appears, move the instrument closer until the signal is detected. - Angle needs adjustment
The magnetic field is directional, so the orientation of the instrument matters. Measurements should be taken at approximately a 45° angle relative to the top of the SmartPeg. - Ensure you have the correct SmartPeg Type for the specific implant
Use this link to find the correct SmartPeg Type: Find my SmartPeg - Soft tissue damping
Surrounding tissue can sometimes dampen the vibration more than expected. Holding the instrument a bit closer usually compensates for this. - The implant platform is not clean
Ensure the implant platform is clean and free of debris, so the SmartPeg seats properly and transmits its vibration. - The SmartPeg is worn or damaged
• If you are using a reusable SmartPeg, make sure it has been inspected before use and that it is within 20 reprocessing cycles. A reusable SmartPeg that is worn out, bent, or has damaged threads will not vibrate correctly — and the instrument may not be able to pick up a reading.
• A single‑use SmartPeg is intended for one treatment session only.
• Ensure the SmartPeg is properly seated on the implant and that it is not in contact with surrounding tissue, as this can prevent accurate signal detection and may result in no ISQ value or an incorrect one. - Electromagnetic interference
Strong electromagnetic noise sources nearby may disturb the measurement. (See the FAQ on “Electromagnetic noise” for details.)
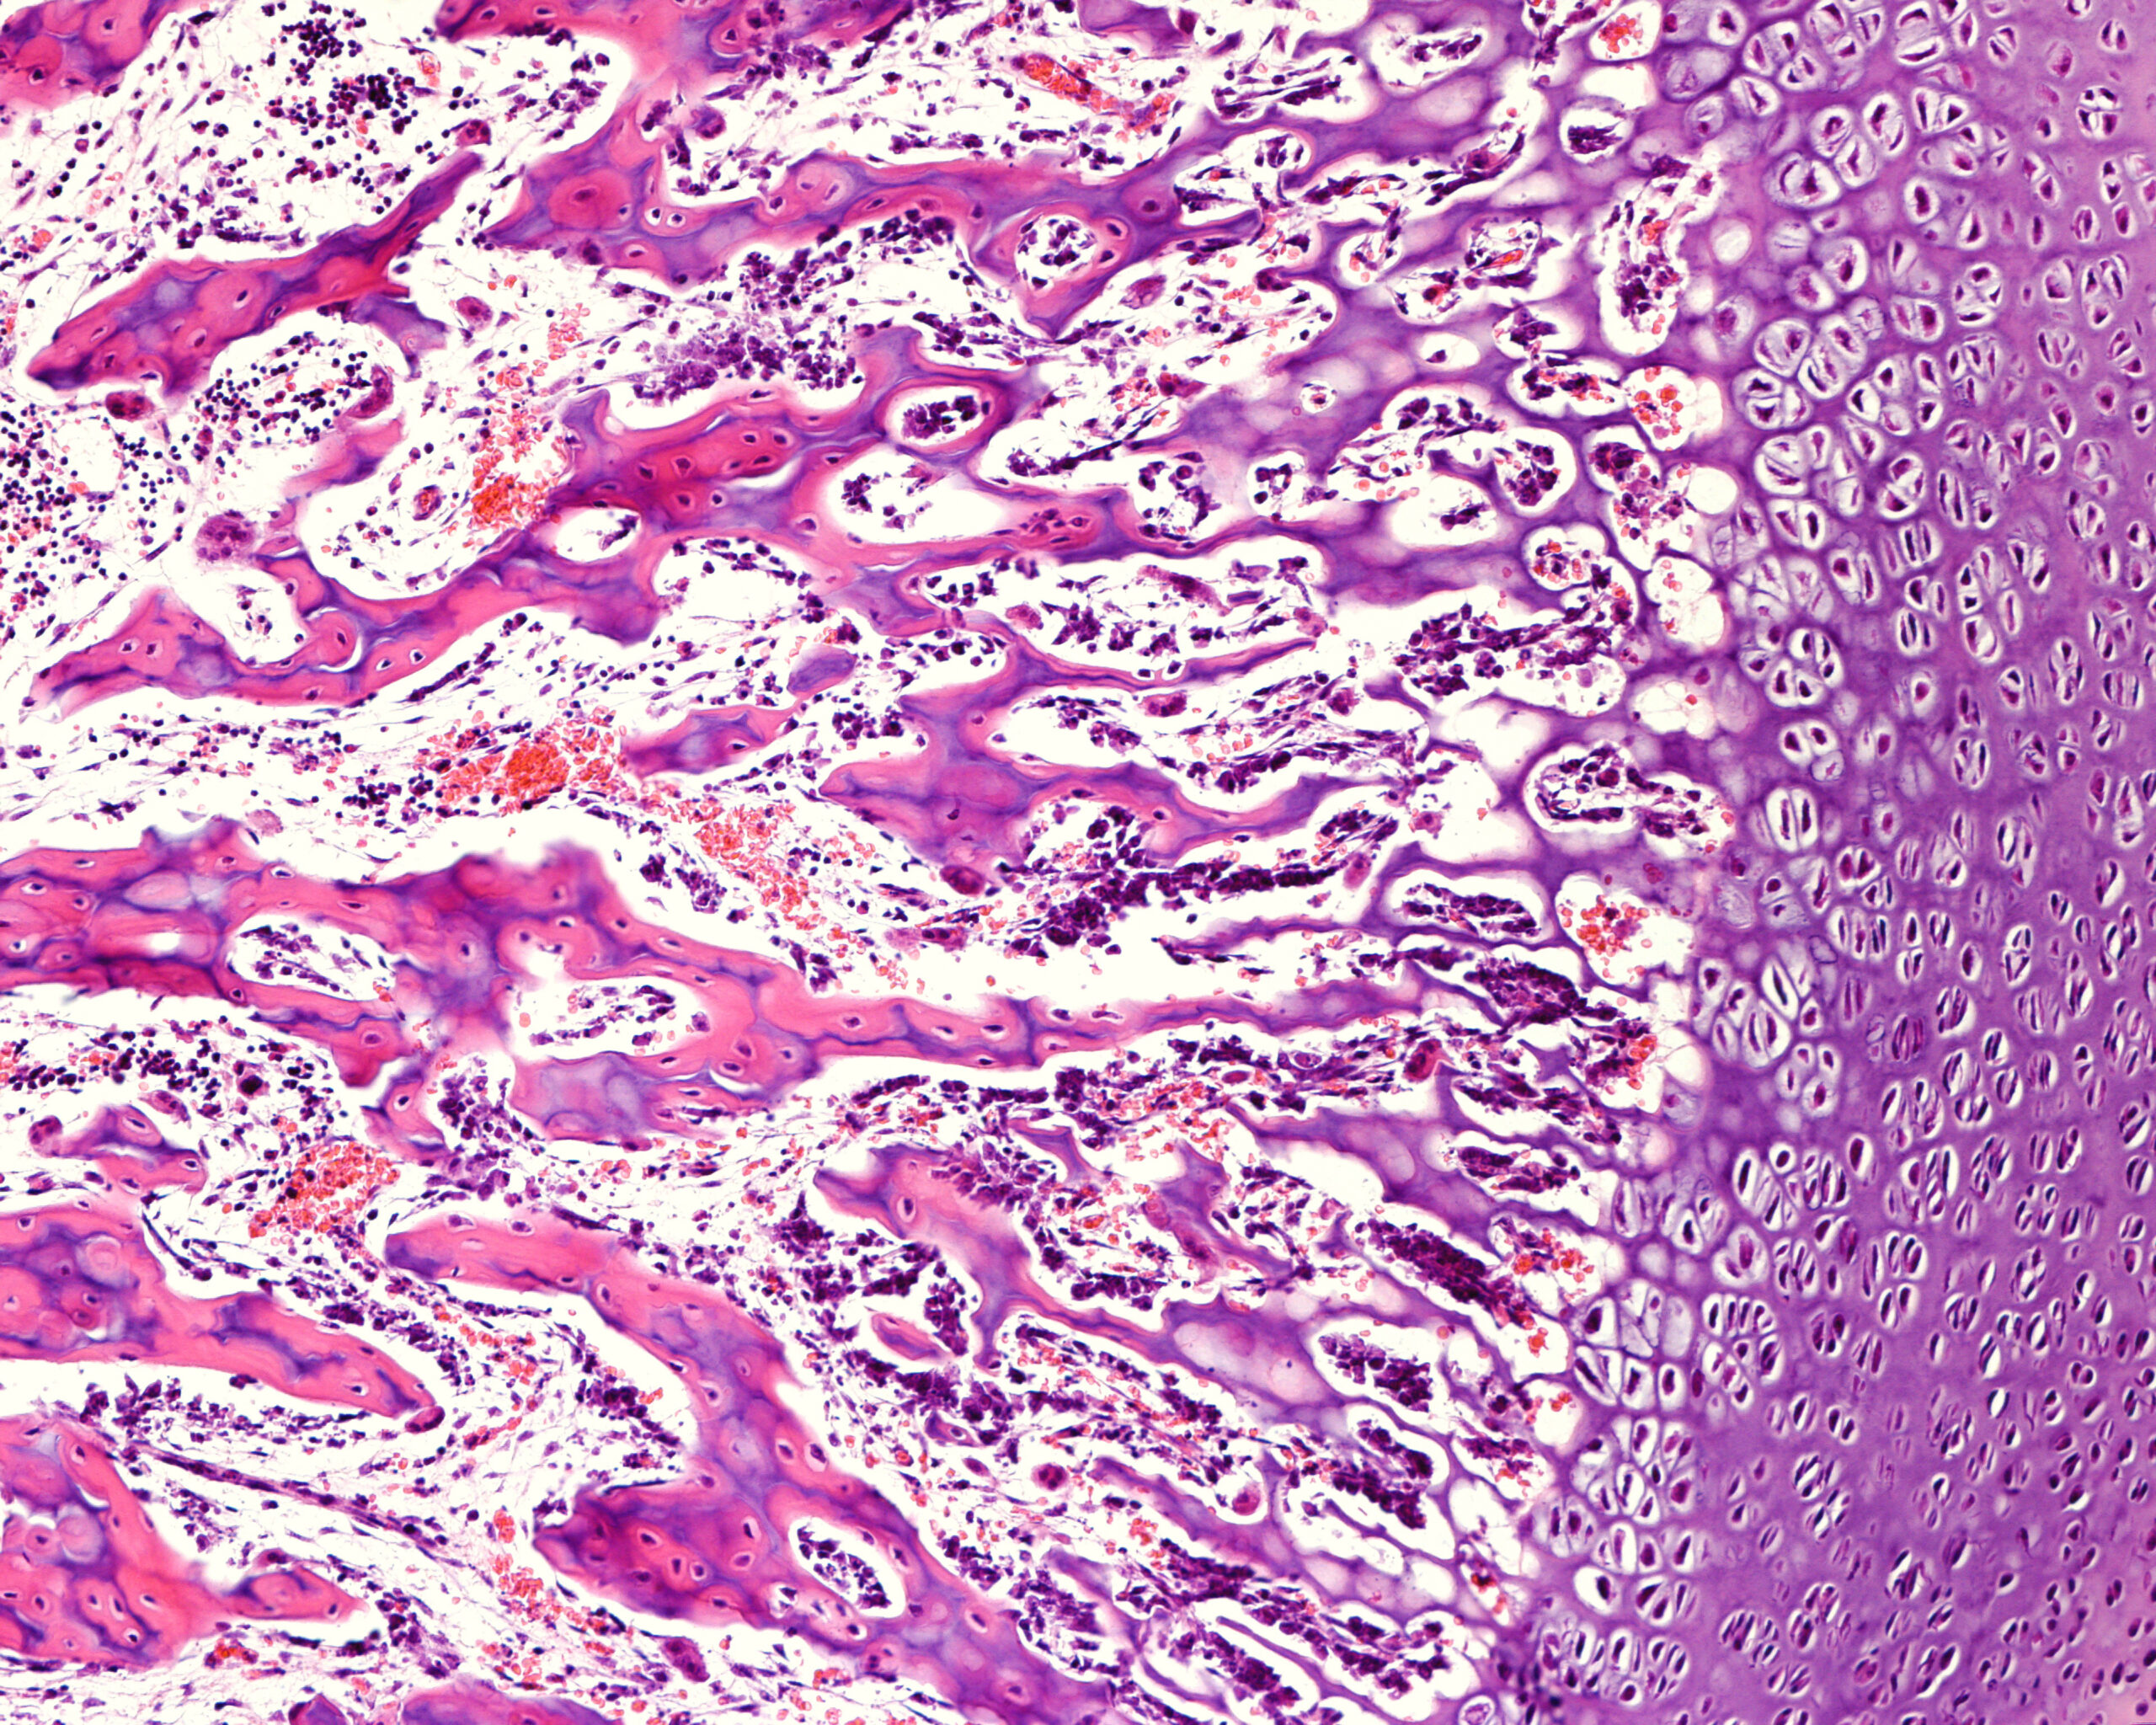
No. The Osstell measurement does not affect the implant. The instrument only makes the SmartPeg vibrate. The SmartPeg’s magnet is activated by very low energy magnetic pulses generated by the instrument. The technique is objective, gentle, and highly repeatable
Yes, ISQ measurements with Osstell’s instruments can be performed on patients with a pacemaker.
As a precaution, the probe should be kept away from the chest area where the pacemaker is located, due to the magnetic pulses emitted during measurement.
There are published reports regarding pacemakers and magnetic fields for further reference. For example, this report.
Measure at implant placement and again before the final restoration to monitor the development of osseointegration. If the ISQ value is not high enough it is advised to add time and remeasure before proceeding with the prosthetic rehabilitation of the implant.
Compreendendo a osseointegração em odontologia
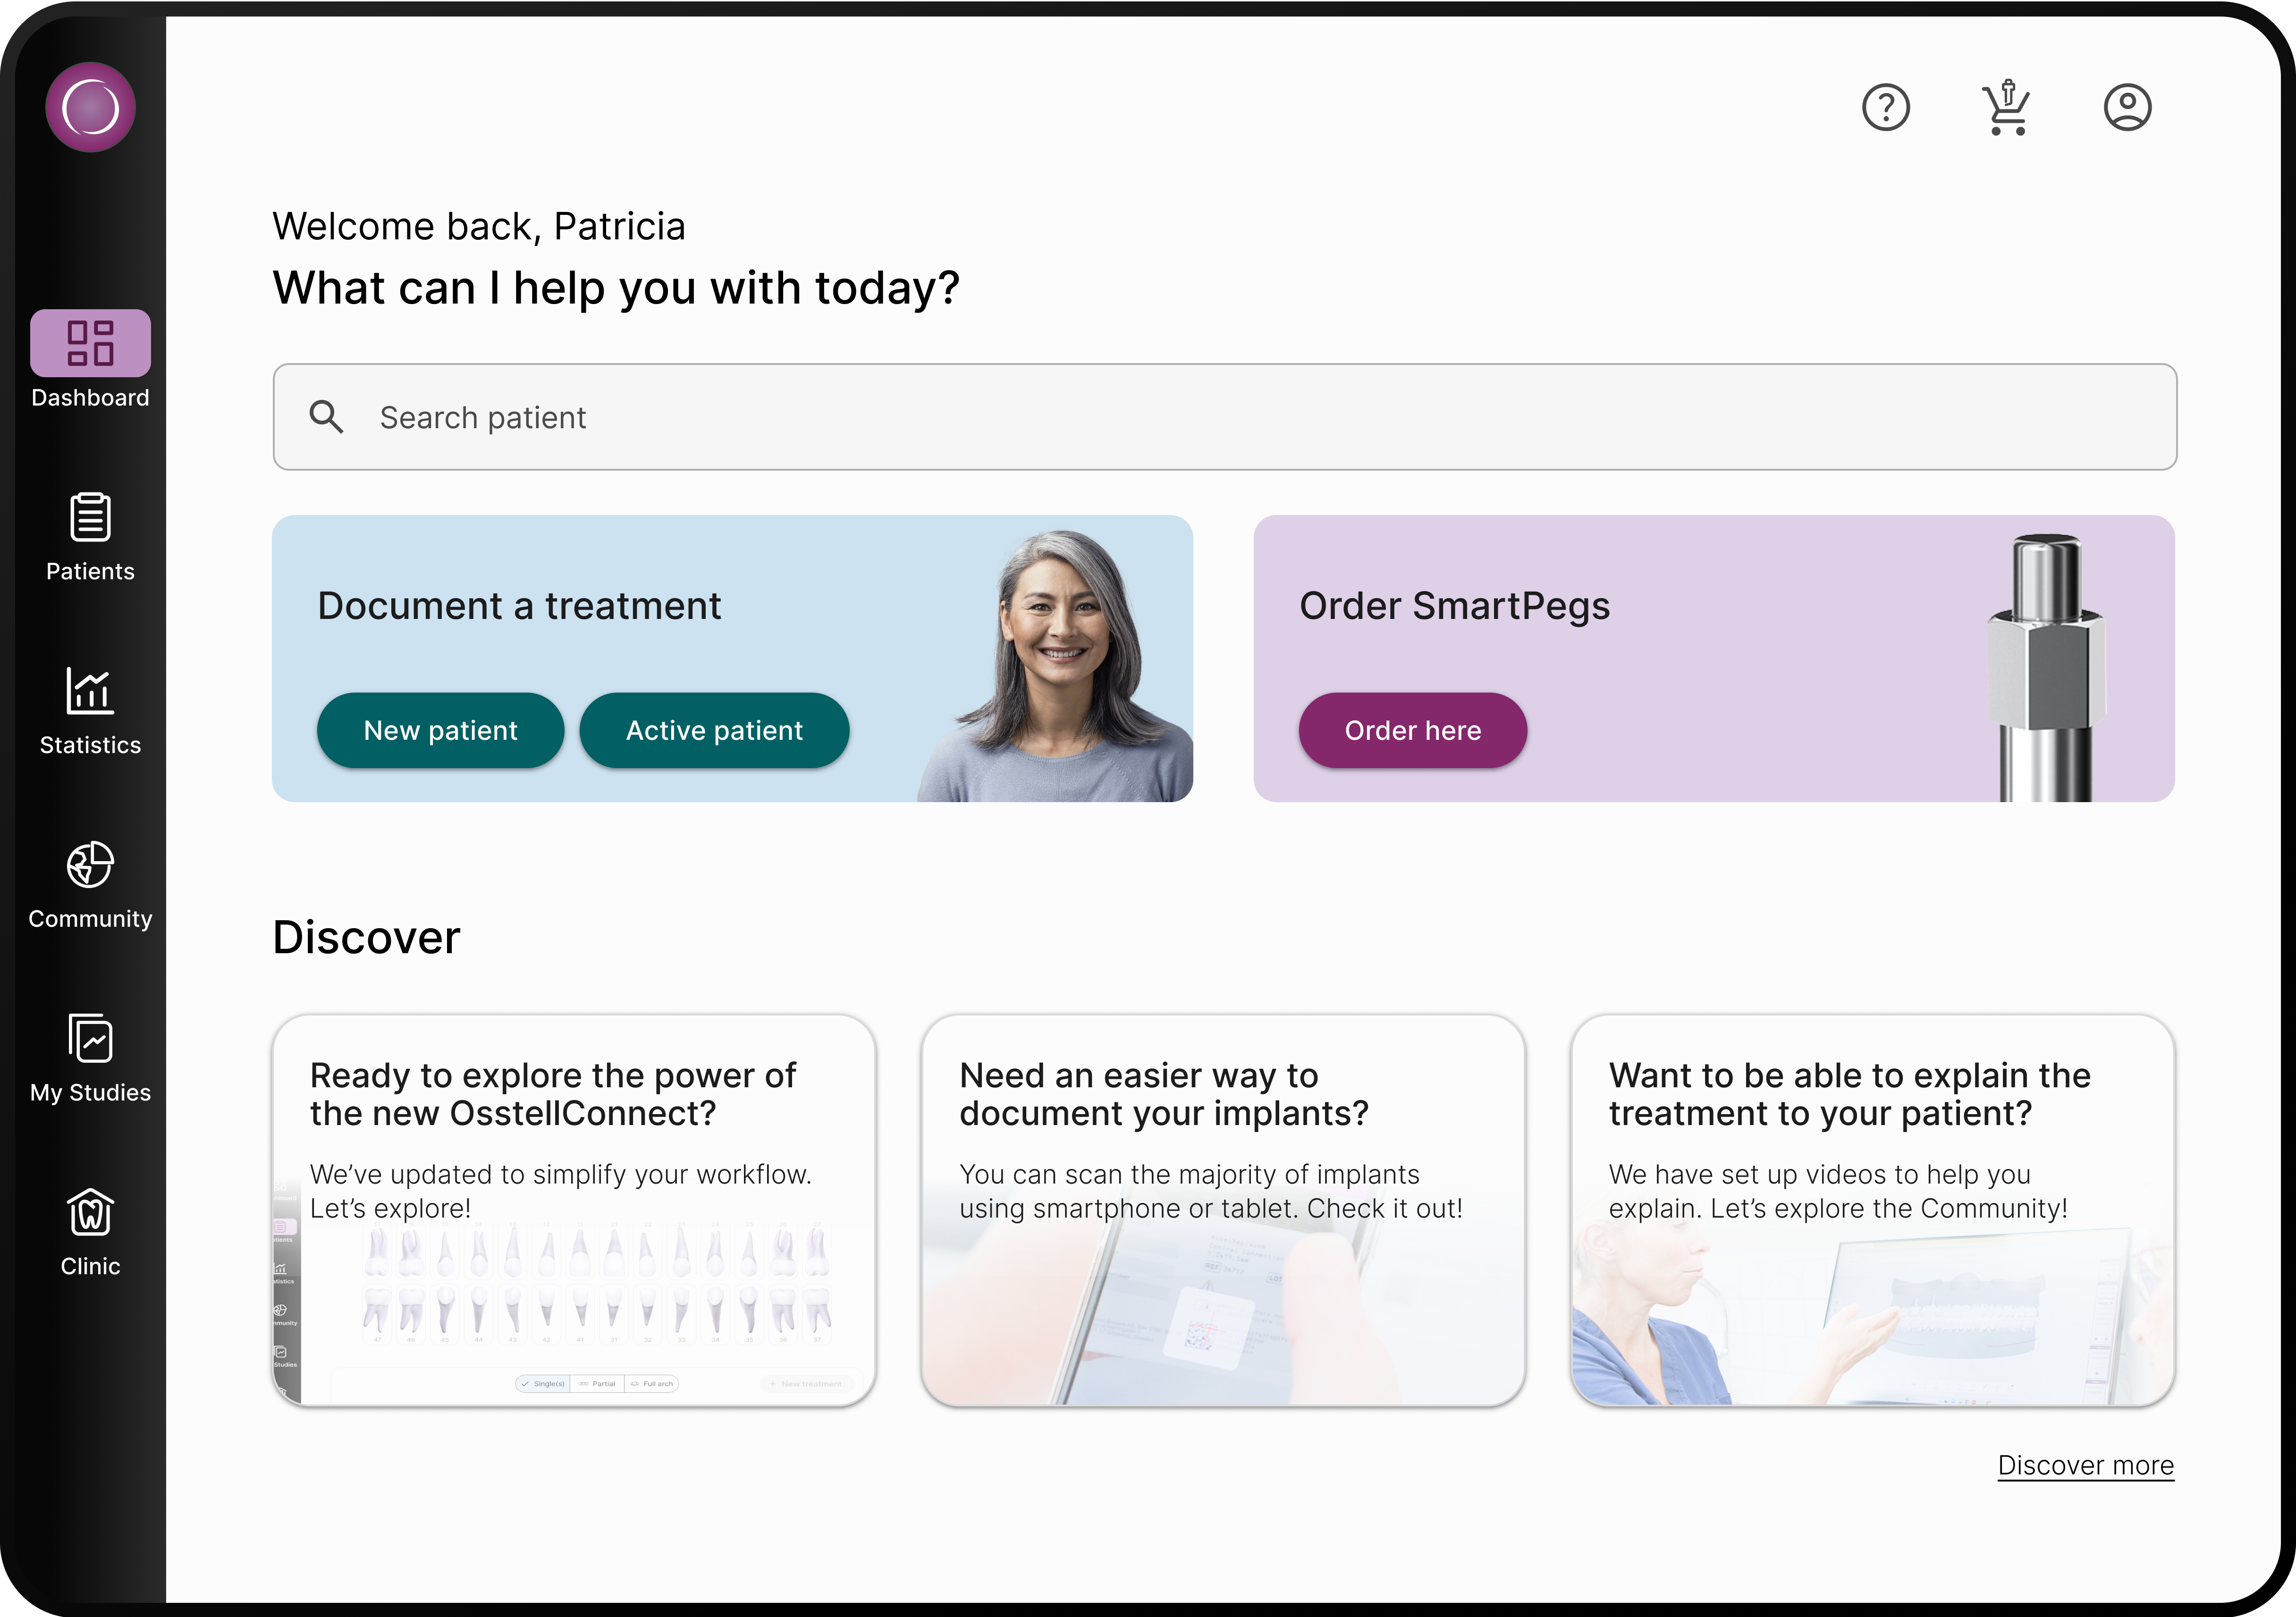
Osstell measures the lateral stability of the implant and thereby indirectly the degree of osseointegration. The results are presented as an ISQ, ranging from 1-99 ISQ, which correlates to micro mobility.
ISQ and BIC measure different aspects of implant integration.
BIC (bone-to-implant contact) describes the percentage of the implant surface in contact with bone at a microscopic level, while ISQ reflects implant stability by measuring the stiffness of the bone–implant interface.
As a result, high BIC does not always mean high stability, as bone quality and stiffness also play a key role.
For a more detailed explanation, see: How ISQ correlates to BIC – Osstell®
Questions about OsstellConnect
You can record ISQ at abutment level in OsstellConnect, but it is important to follow the correct clinical measurement procedure to obtain accurate values.
How to measure ISQ at abutment level
- Perform an implant level measurement first, before placing the abutment.
- Measure again at abutment level during the same session, using a SmartPeg made for abutment level measuring.
- Determine the offset by noting the difference between implant level and abutment level ISQ. This offset remains stable throughout healing and should be used when interpreting follow-up measurements.
- For all subsequent visits, measure on the abutment and apply the same offset to understand the true implant ISQ.
How to record the measurement in OsstellConnect:
- Go to the patient’s record, select the patient and the implant in the tooth chart. Click ‘Add abutment’, choose the abutment, and save.
- Select ‘Measure stability’ and choose ‘Abutment’ under Measurement level. Measure on the abutment as you would at implant level and save.
- To review the stability trend, open the Stability tab and toggle ‘Show abutment’. You can also enable ‘Show details’ to view buccal–lingual and mesial–distal ISQ values.
For a more detailed explanation and clinical guidance, see our blog post here.
• To document an implant failure, go to your patients records. Select the patient, then select the tooth. Click ‘Mark as failed’. Choose the type of failure (early or late failure), fill in the failure date. Choose the reason for failure. Click ‘Mark as failed’.
• You can access the history of the implant failure by navigating to the history tab. Click the tab ‘Failed’ to see all information related to the treatment and the failure.
• A history symbol is displayed on the tooth with a failed implant.
The data in your Osstell IDx is automatically uploaded to your OsstellConnect account, if it is connected to the internet. To connect your device to the internet, please follow the instructions here.
Please note that you can also create backups, for example on a USB stick. Please follow the instructions here.
Before starting, make sure that you have already installed the Beacon Gateway. If you have not installed it yet, please navigate to your clinic in your account, click the instruments tab and download the gateway. Install it.
• Plug in the Osstell Key to a USB port on your computer.
• Take your instrument in hand. It is now connecting to OsstellConnect and you should see the following symbol animating. Please note that it can take a few seconds.
• When connected, the symbol stops animating.
• Go to your patient records.
—— If it is the first measurement, create a patient. Fill in patient data and save. Click New Treatment and fill in treatment information. Click Add implant, fill in implant data and save. Click measure stability.
—— If it is a follow up measurement, select the patient and then the tooth on the teeth chart. Click measure stability.
• Measure in buccal lingual direction. The ISQ value is now showing in OsstellConnect.
• Measure in mesial distal direction. The ISQ value is now showing in OsstellConnect.
• Fill in the information about the treatment and save.
Yes, simply navigate to your patient records. Select the patient. Select the implant. Go to the stability tab. Click on the edit icon by the measurement you would like to delete. Click delete. Please note that the measurement will be permanently removed from the patient chart.
Yes, simply navigate to your patient records. Select the patient you would like to delete. Click delete in the upper right corner. Confirm that you want to delete the patient and all data. Please note that it will be permanently removed from your account.
Yes, you can export all your data to an Excel file for further analysis. Simply go to your patients records and click CSV export. The file will appear in your downloads.
Yes, simply navigate to your patient records. Select the patient. Select the implant you want to edit on the tooth chart. Select the tab ‘Implant & abutment’. Click on the pen icon to edit. Edit implant data. Save.
Simply navigate to your patient records. Select the patient. Click ‘edit’ on the top right corner. Edit the data and save.
You can find the serial number on the back of your instrument.
Osstell Beacon
• To find your registration code, please make sure that you have already installed the Beacon Gateway. If you have not installed it yet, please navigate to your clinic in your account, click the instruments tab and download the gateway. Install it.
• Make sure that you have inserted the Osstell Key to your computer.
• Take your instrument in hand. It is now connecting to OsstellConnect and you should see a symbol animating. Please note that it can take a few seconds.
• When connected, the symbol stops animating.
• The registration code is now displayed on the lower screen of your instrument.
Osstell IDx
• When turning on your Osstell IDx for the first time, you will be prompted to select language, time zone, date and time.
• After that, you will need to set up a 4-digit pin code and a backup password. The backup password is needed when restoring to a backup, so please note it down and save it in a safe place.
• Your registration code is now displayed on your Osstell IDx.
ISQ should always be measured in two directions, because implant stability can vary depending on the amount of surrounding bone in different directions. Measuring from two angles ensures that both the most and the least stable directions are captured.
To do this, take one measurement in the buccal-lingual direction and one in the mesial-distal direction. These two ISQ values represent the different stability directions. Sometimes the values are identical; sometimes they differ.
If the two measurements differ, always rely on the lowest ISQ value, as it reflects the weakest direction and therefore provides the most clinically relevant information about implant stability.
Questions about the Osstell IDx
You can record ISQ at abutment level in OsstellConnect, but it is important to follow the correct clinical measurement procedure to obtain accurate values.
How to measure ISQ at abutment level
- Perform an implant level measurement first, before placing the abutment.
- Measure again at abutment level during the same session, using a SmartPeg made for abutment level measuring.
- Determine the offset by noting the difference between implant level and abutment level ISQ. This offset remains stable throughout healing and should be used when interpreting follow-up measurements.
- For all subsequent visits, measure on the abutment and apply the same offset to understand the true implant ISQ.
How to record the measurement in OsstellConnect:
- Go to the patient’s record, select the patient and the implant in the tooth chart. Click ‘Add abutment’, choose the abutment, and save.
- Select ‘Measure stability’ and choose ‘Abutment’ under Measurement level. Measure on the abutment as you would at implant level and save.
- To review the stability trend, open the Stability tab and toggle ‘Show abutment’. You can also enable ‘Show details’ to view buccal–lingual and mesial–distal ISQ values.
For a more detailed explanation and clinical guidance, see our blog post here.
Navigate to your clinic in your account. Select the instrument tab. Click on Download firmware.
Download instructions:
• Wait for the download to complete (could take a while depending on your connection)
• Copy the .m2f binary file to a USB memory stick
• Insert the memory stick in your IDx while it is running
• Follow instructions on the IDx display
Note: you cannot open or view the .m2f file
You can also check this guide
Two years.
If the battery is fully drained, the IDx loses its date and time settings and prompt you to set them again at start up.
Connecting the device to the internet allows the date and time to be set automatically.
An electromagnetic noise warning indicates the presence of an external alternating magnetic field in the environment. This can occasionally be caused by nearby electronic equipment.
If the probe is very close to the instrument (within a few centimetres), the instrument itself may trigger the warning.
If the warning appears when measuring a SmartPeg, possible causes include:
- High implant stability: A very strong signal (e.g. in highly stable implants or models without soft tissue) can trigger the warning. Try increasing the distance between the probe and the SmartPeg slightly.
- Improperly mounted SmartPeg: If the SmartPeg is not properly attached, it may cause interference. In such cases, check the fit and replace the SmartPeg if the threads are damaged.
ISQ should always be measured in two directions, because implant stability can vary depending on the amount of surrounding bone in different directions. Measuring from two angles ensures that both the most and the least stable directions are captured.
To do this, take one measurement in the buccal-lingual direction and one in the mesial-distal direction. These two ISQ values represent the different stability directions. Sometimes the values are identical; sometimes they differ.
If the two measurements differ, always rely on the lowest ISQ value, as it reflects the weakest direction and therefore provides the most clinically relevant information about implant stability.
Simply register your IDx by following the instructions in the device or by following this link.
For normal use, the batteries last for at least one day but in most cases longer. It takes about 2
hrs to charge the IDx from a fully discharged state.
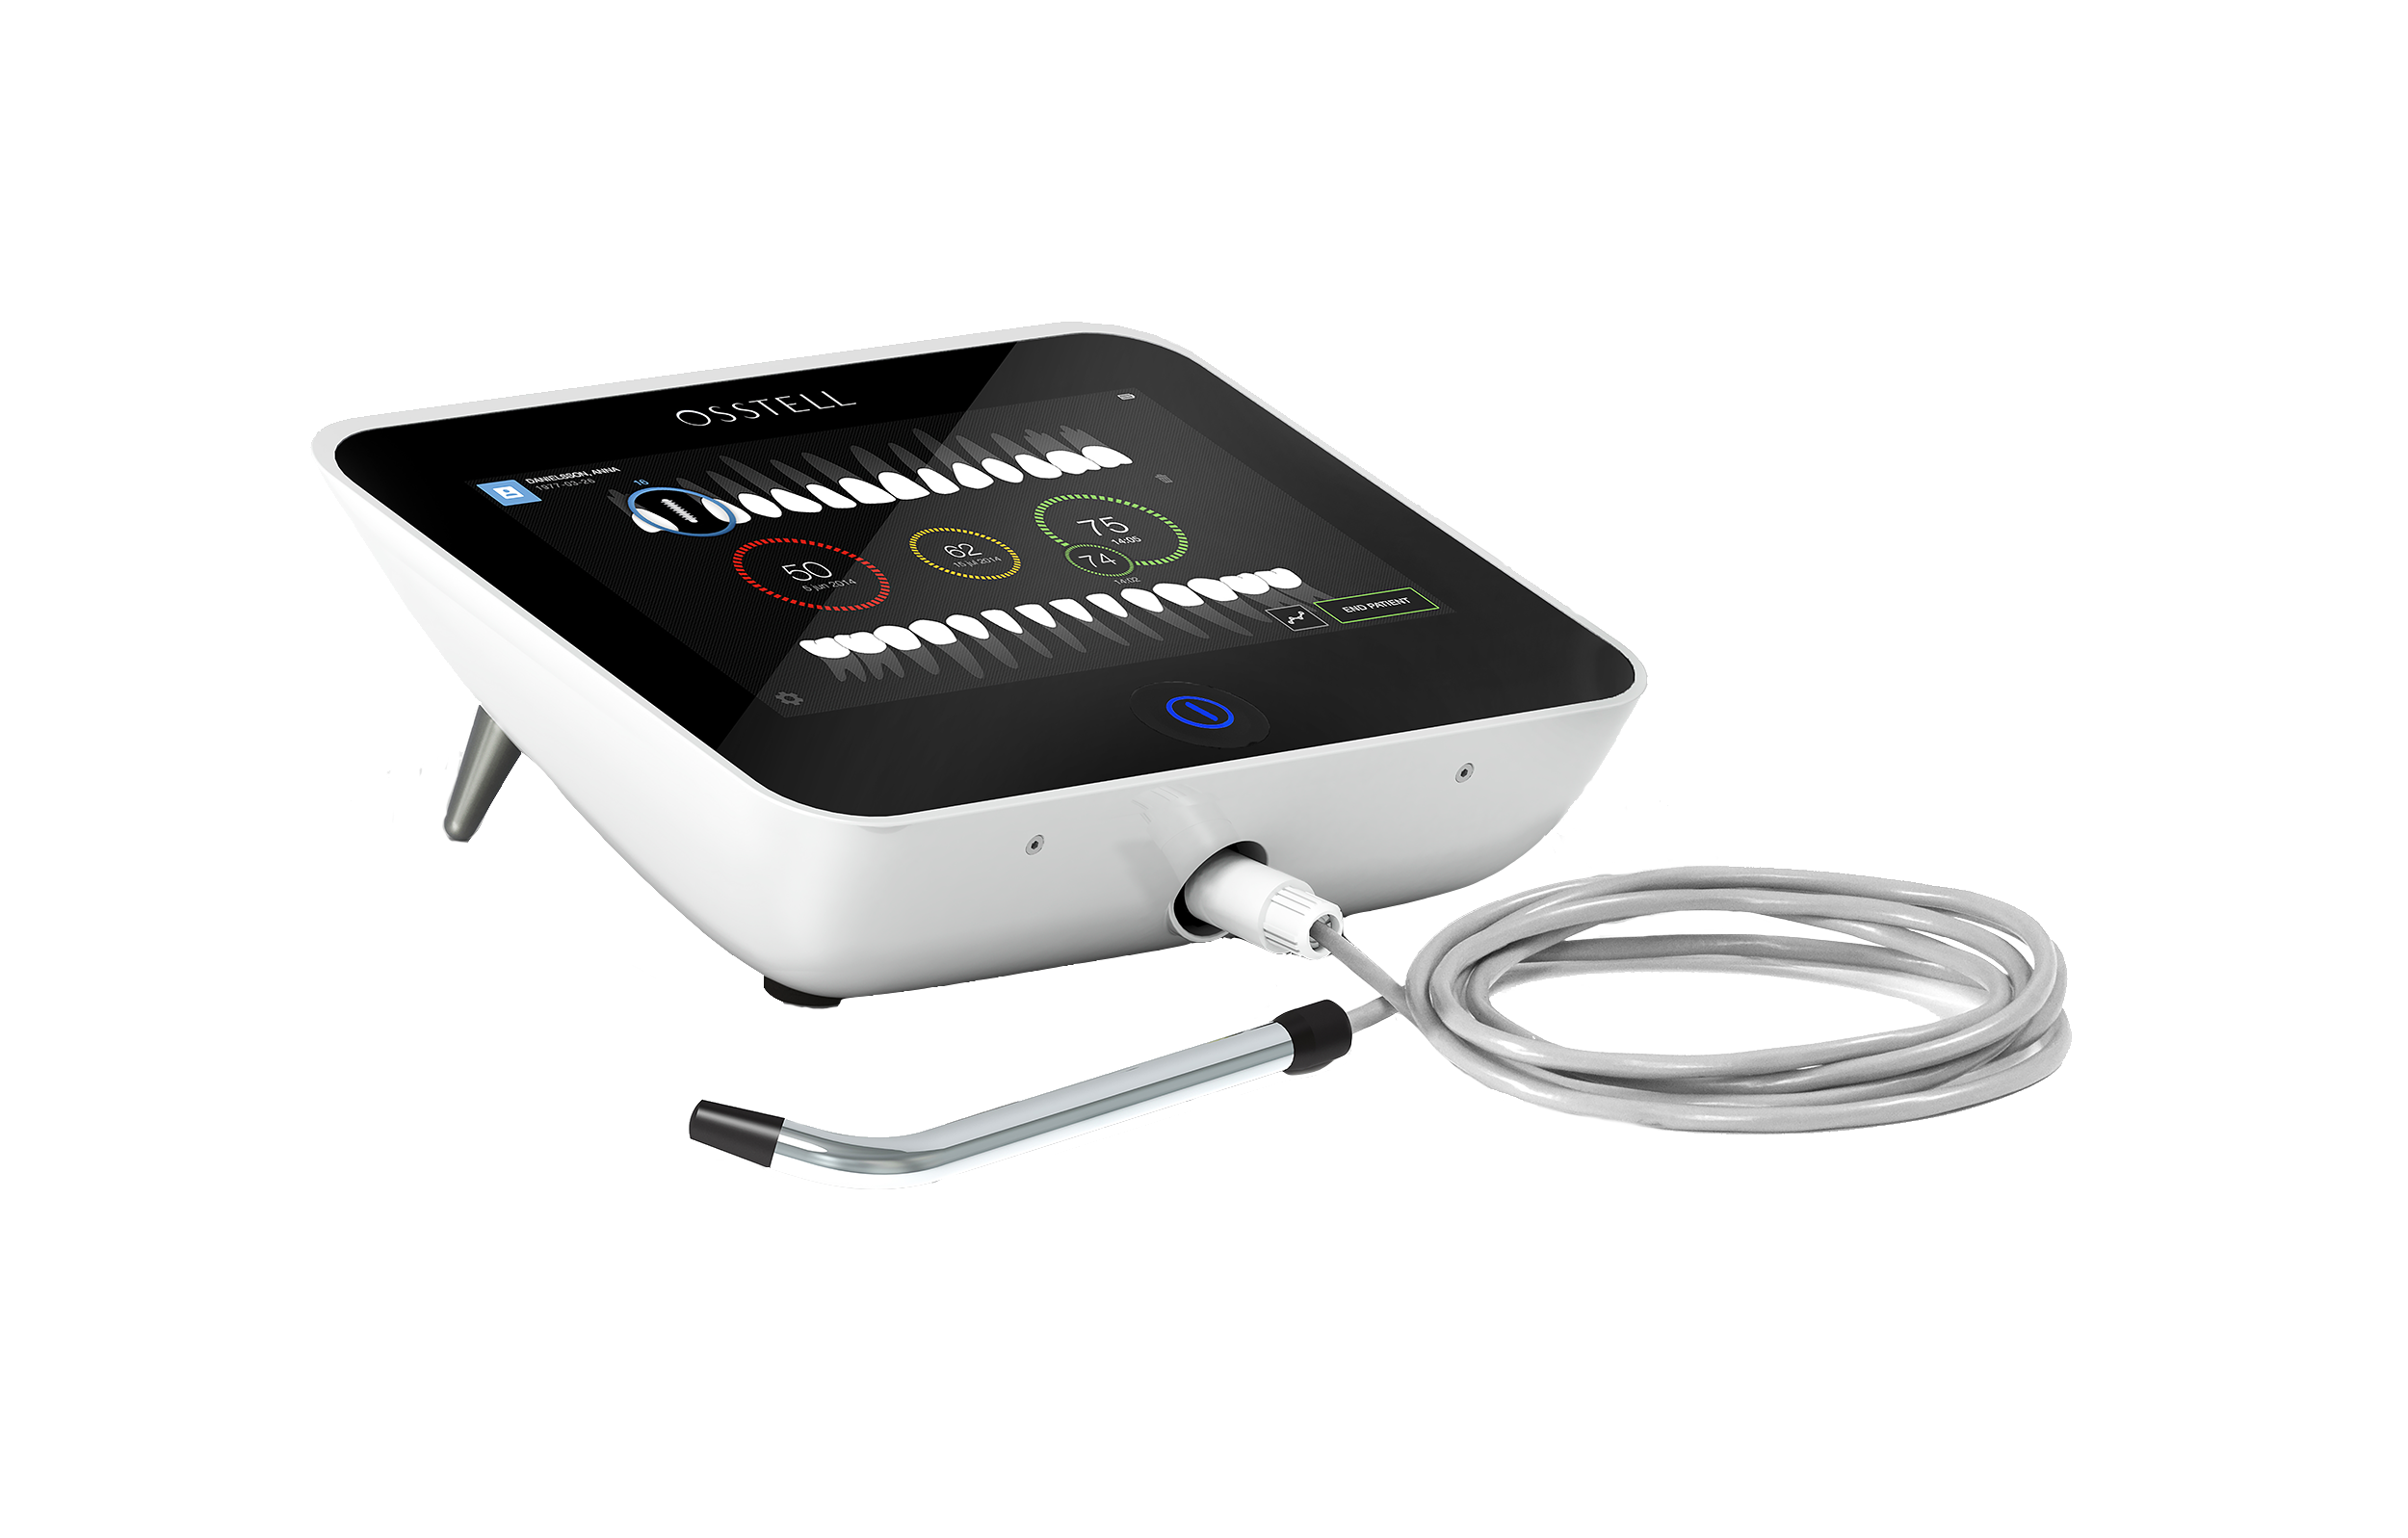
Simply choose a tooth position on the touch screen and start measuring.
No. The Osstell measurement does not affect the implant. The instrument only makes the SmartPeg vibrate. The SmartPeg’s magnet is activated by very low energy magnetic pulses generated by the instrument. The technique is objective, gentle, and highly repeatable
Perform measurements, press End patient, and then save as Add new patient.
Simply select the pen symbol in the patient list to edit.
The patient data can be saved either in the instrument or on Osstell Connect.
Values can only be removed before saving clicking on the trash bin symbol. After saving the data cannot be modified.
Yes, OsstellConnect is accessible via iPhone, iPad, Mac or PC.
Have you registered your device? You can only use the Osstell IDx for a limited time without
registration.
The following products may be autoclaved (over-pressurized steam up to 135 deg Celsius):
- SmartPeg Mount
- Reusable SmartPeg
- Probe (IDx)
Please note that single-use SmartPegs are disposable and cannot be autoclaved!
Yes, ISQ measurements with Osstell’s instruments can be performed on patients with a pacemaker.
As a precaution, the probe should be kept away from the chest area where the pacemaker is located, due to the magnetic pulses emitted during measurement.
There are published reports regarding pacemakers and magnetic fields for further reference. For example, this report.
To enable automatic backup of your Osstell IDx, you will be asked to create a backup code made up of 8 characters. The purpose of the backup is to reset the unit if you for some reason remove patients by mistake or lose your instrument. The code is created during the registration process and you only have to enter it once. To make sure you can access your backup at a later date, it is VERY important that you write this code down and keep it in a safe place.
Backup can also be done via USB without a code.
Measure at implant placement and again before the final restoration to monitor the development of osseointegration. If the ISQ value is not high enough it is advised to add time and remeasure before proceeding with the prosthetic rehabilitation of the implant.
Questions about Osstell and the ISQ scale
ISQ means Implant Stability Quotient and derives from Herz since the technique we use is Resonance Frequency Analysis (RFA). The scale in Herz is non-intuitive and hard to communicate so it was translated to a scale of ISQ 1-99, more than 20 years ago. Today we know that the scale correlates to micro mobility and that high stability means > 70 ISQ, between 60-69 is medium stability and < 60 ISQ is considered as low stability.
An ISQ value (Implant Stability Quotient) is a numerical measurement of implant stability on a scale from 1 to 99, where higher values indicate greater stability.
The scale is non-linear, meaning that a difference in ISQ can represent a significant change in stability – for example, the increase in stability from ISQ 60 to 70 is close to 50%.
ISQ is used to assess and monitor implant stability over time, supporting clinical decision-making throughout treatment.
You can read more about the ISQ scale here.
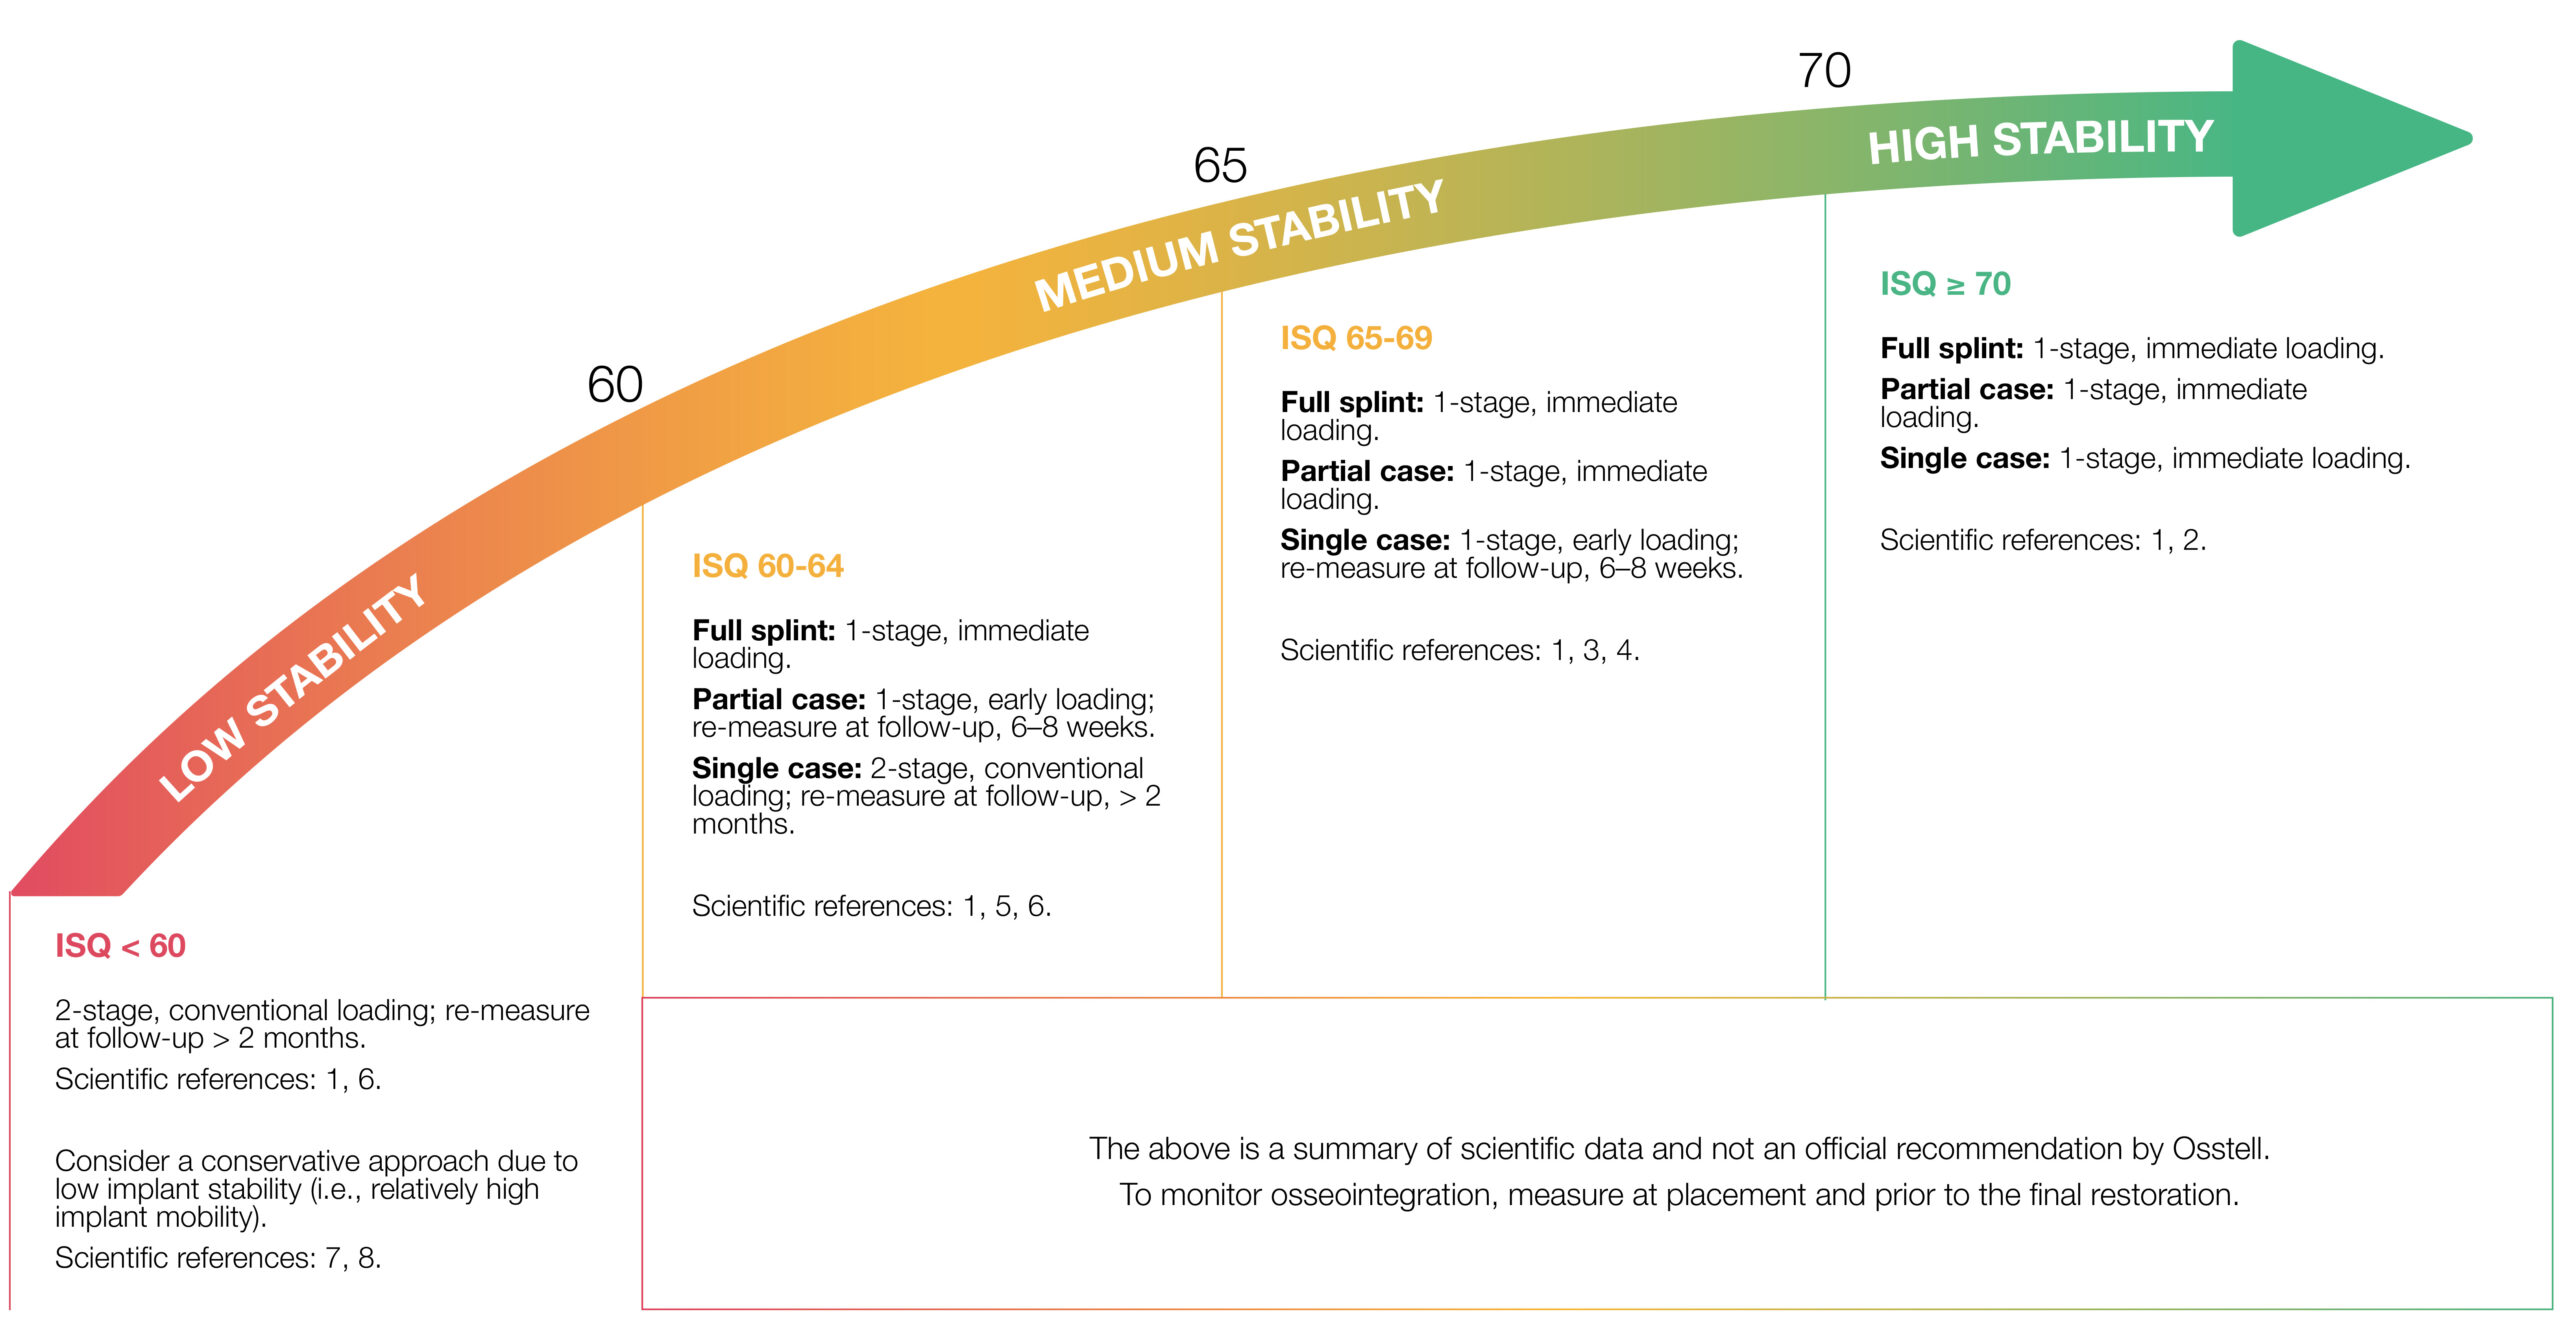
ISQ is one parameter used to support decisions on when to load an implant, and should always be considered together with the clinical situation.
As a general guideline, ISQ values above 70 indicate high stability and may support earlier loading, while lower values may require a more cautious approach and follow-up measurements.
Monitoring ISQ over time is important, as stable or increasing values indicate favourable healing and osseointegration.
You can read more about the ISQ scale here.
SmartPegs can be used for several implants in one patient session, but never reused later.
They can be used for multiple implants during the same patient session, but not reused later. The magnet cannot withstand autoclaving, and the soft threads are designed to protect the implant’s internal threads. Reusing a SmartPeg may damage the implant or give inaccurate ISQ values.
ISQ should always be measured in two directions, because implant stability can vary depending on the amount of surrounding bone in different directions. Measuring from two angles ensures that both the most and the least stable directions are captured.
To do this, take one measurement in the buccal-lingual direction and one in the mesial-distal direction. These two ISQ values represent the different stability directions. Sometimes the values are identical; sometimes they differ.
If the two measurements differ, always rely on the lowest ISQ value, as it reflects the weakest direction and therefore provides the most clinically relevant information about implant stability.
The decision to proceed with immediate loading should not be based on the ISQ value alone.
While a high ISQ indicates good primary stability – which is an important factor for successful immediate loading – other clinical parameters must also be considered, such as bone quality, implant type, and patient-specific factors.
As a general guideline, ISQ values above 70 indicate high stability and may support immediate loading. Many studies report good outcomes in such cases, particularly when stability remains high throughout healing.
Monitoring the ISQ trend over time is also important, as stable or increasing values indicate favourable conditions for osseointegration and loading.
There are currently thousands of articles where Osstell was used in the study, published in scientific papers. These abstracts could be found in our searchable database under “Resources/Scientific database“.
Osstell measures the lateral stability of the implant and thereby indirectly the degree of osseointegration. The results are presented as an ISQ, ranging from 1-99 ISQ, which correlates to micro mobility.
Osstell measures implant stability using Resonance Frequency Analysis (RFA). The small SmartPeg that you attach to the implant has a tiny magnet on top. When the probe sends magnetic pulses, the SmartPeg starts to vibrate – similar to a very small tuning fork.
How it works:
- The probe sends magnetic pulses
These pulses make the SmartPeg vibrate without touching it. - The vibration changes depending on how stable the implant is
– A stable implant (good bone support) makes the SmartPeg vibrate faster.
– A less stable implant makes it vibrate slower. - The device converts this vibration into an ISQ value
– Higher stability → higher frequency → higher ISQ
– Lower stability → lower frequency → lower ISQ
It takes less than a second, and the ISQ value is shown immediately.
Periotest (DCA) measurements are designed for natural teeth, which are connected to the bone via the periodontal ligament. In contrast, dental implants are anchored directly to the bone without a periodontal ligament.
RFA (Osstell ISQ) uses a non-contact, non-invasive technique to measure implant stability. It provides an objective and repeatable value on a more sensitive scale, supporting reliable assessment over time.
Read more here: Do different methods for measuring implant stability give the same answer? – Osstell®
Torque is a one-time, static measurement taken at implant placement and cannot be repeated later without risking the implant’s osseointegration. It reflects the rotational friction between the implant surface and the bone, rather than the lateral stability of the implant.
Measuring implant stability with Osstell instruments assesses the lateral stability of the implant. These measurements are contact-free and can be repeated over time to monitor the development of osseointegration.
Yes. The ISQ value can be affected if the SmartPeg is not mounted correctly.
For accurate measurements, the SmartPeg should be attached finger tight using the SmartPeg Mount, which corresponds to about 4–6 Ncm.
At this level, the SmartPeg has firm, stable contact with the implant, and the resulting ISQ value is consistent – typically within ±2 ISQ units.
- If the SmartPeg is not fully seated:
The contact becomes unstable, and the ISQ value can appear artificially low, or you don’t receive any value. - If too much force is applied:
Overtightening does not improve accuracy. It may damage the SmartPeg threads.
– A reusable SmartPeg may be damaged so it cannot be used again.
– A single use or reusable SmartPeg may have its threads deformed, which can lead to inaccurate measurements during that session or, in worst case a broken SmartPeg.
In short: finger tight (4–5 Ncm) is enough to ensure stable contact and reliable ISQ readings.
If no ISQ value appears, it usually means the SmartPeg’s vibration is not being detected clearly by the instrument. Several factors can cause this, and most are easy to resolve:
- Distance to instrument is too great
The instrument should normally be held 2–4 mm from the magnet on top of the SmartPeg. Do not touch the magnet. If no value appears, move the instrument closer until the signal is detected. - Angle needs adjustment
The magnetic field is directional, so the orientation of the instrument matters. Measurements should be taken at approximately a 45° angle relative to the top of the SmartPeg. - Ensure you have the correct SmartPeg Type for the specific implant
Use this link to find the correct SmartPeg Type: Find my SmartPeg - Soft tissue damping
Surrounding tissue can sometimes dampen the vibration more than expected. Holding the instrument a bit closer usually compensates for this. - The implant platform is not clean
Ensure the implant platform is clean and free of debris, so the SmartPeg seats properly and transmits its vibration. - The SmartPeg is worn or damaged
• If you are using a reusable SmartPeg, make sure it has been inspected before use and that it is within 20 reprocessing cycles. A reusable SmartPeg that is worn out, bent, or has damaged threads will not vibrate correctly — and the instrument may not be able to pick up a reading.
• A single‑use SmartPeg is intended for one treatment session only.
• Ensure the SmartPeg is properly seated on the implant and that it is not in contact with surrounding tissue, as this can prevent accurate signal detection and may result in no ISQ value or an incorrect one. - Electromagnetic interference
Strong electromagnetic noise sources nearby may disturb the measurement. (See the FAQ on “Electromagnetic noise” for details.)

Clinically, the lowest ISQ values typically seen are around 40.
If the stability is below 30, the implant is generally considered to have very low stability or to be loose. It may also indicate that the SmartPeg is not correctly mounted on the implant.
Very low values (below 20) are rarely seen in clinical situations and are more commonly observed in laboratory models with artificially low stability.
Yes, ISQ measurements with Osstell’s instruments can be performed on patients with a pacemaker.
As a precaution, the probe should be kept away from the chest area where the pacemaker is located, due to the magnetic pulses emitted during measurement.
There are published reports regarding pacemakers and magnetic fields for further reference. For example, this report.
Measure at implant placement and again before the final restoration to monitor the development of osseointegration. If the ISQ value is not high enough it is advised to add time and remeasure before proceeding with the prosthetic rehabilitation of the implant.