Osstell Beacon
골유착? 용이합니다.
Osstell Beacon은 객관적이고 비침습적인 방법으로 임플란트 안정성을 판정하고 치유 과정을 위험하지 않게 하며 골유착 진행 상황을 평가하는 데 도움이 됩니다. Osstell Beacon은 수천 건의 과학적 연구를 기반으로 하는 독점적인 증거 기반 RFA 기술을 사용합니다. 또한 광범위한 임플란트 데이터에 대한 액세스를 제공하고 환자와 더 효과적으로 커뮤니케이션할 수 있도록 지원하는 무료 클라우드 기반 플랫폼인 OsstellConnect를 포함하고 있습니다.
예측 가능한 결과
당사의 방법은 추측을 없앱니다. Osstell은 임플란트 안정성을 객관적인 값으로 측정함으로써 모든 환자가 임플란트 치료를 보다 쉽게 예측하고 안심하고 받을 수 있도록 합니다.
최적의 치료 시간
즉각적인 임플란트 식립이 보편화되고 있습니다. 환자들은 결과를 빨리 얻기를 원합니다. Osstell®을 사용하면 정말 필요한 만큼만 기다리면 됩니다.
입증된 방법
1,500개 이상의 과학적 연구를 기반으로 하는 당사 방법은 RFA를 기반으로 임플란트가 충분히 안정적인지 여부를 결정합니다. 결과는 1~99 사이의 ISQ 값으로 표시됩니다. ISQ가 높을수록 임플란트가 더 안정적입니다.
OSSTELLCONNECT & OSSTELL BEACON
提高种植体治疗效果
OsstellConnect是一种免费的基于云的解决方案,为临床医生提供了一种新方法,通过数据提高牙种植体治疗效果。它是世界上最大的种植体在线门户,拥有超过25万个数据点。OsstellConnect目前是免费的,可供Osstell Beacon和Osstell IDx访问。
登录Implantmed & Osstell Beacon
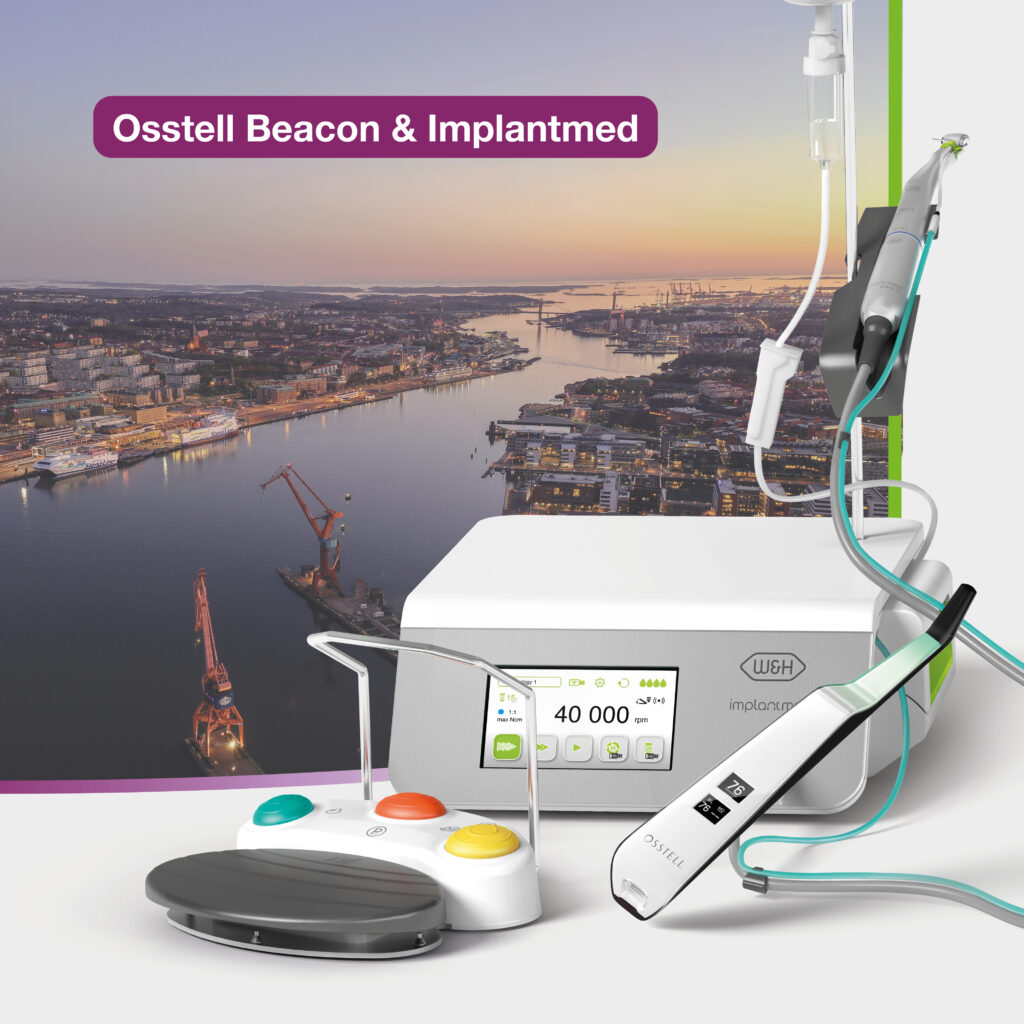
W&H의 Implantmed와 Osstell Beacon으로 정확성과 신뢰성 제공
Osstell Beacon과 함께 사용할 경우
W&H의 Implantmed 플러스는 안전하고 정밀한 임플란트 시술을 위한 이상적인 솔루션을 제공합니다. 안전한 임플란트 삽입을 위한 자동 토크 제어 및 정밀도 향상을 위한 스레드 커터 기능과 같은 기능을 통해 Implantmed는 간편하고 정확한 시술을 보장합니다. Osstell Beacon은 실시간 ISQ 안정성 측정값을 화면에 직접 표시하여 문서화를 간소화하고 최적의 환자 결과를 지원함으로써 이러한 경험을 더욱 향상시킵니다.
Implantmed+Beacon 패키지를 살펴보고 진료의 정밀도를 높이십시오.
비디오
기기 설정 – 단계별
이 짧은 비디오에서 Osstell Beacon을 설정하고 등록하는 방법을 단계별로 소개합니다. 5분 동안 시작해서 SmartPeg 2상자를 무료로 받으세요.
여기에서 등록하기
Osstell Beacon으로 임플란트 안정성 측정
Osstell Beacon은 몇 초 만에 임플란트 안정성을 판정합니다. 이 비디오에서는 측정 방법을 보여줍니다. 더 많은 단계별 가이드를 보려면 OsstellConnect 계정의 도움말 섹션을 방문하세요.
OsstellConnect로 이동하기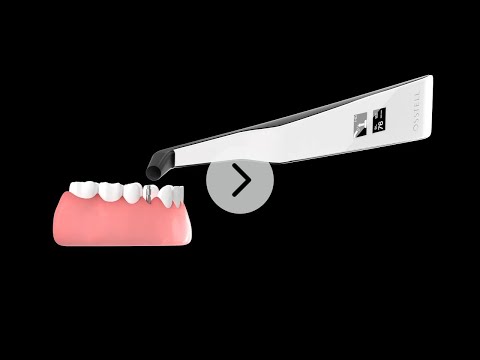
Search for distributor
Frequently asked questions
Got a question regarding Osstell Beacon? Our FAQ is the fastest way to get help. Below you will find the most frequently asked questions regarding Osstell Beacon. If you can’t find the answer you are looking for, don’t hesitate to contact us.
Charge the Beacon for at least 30 min in room temperature, then try again. If the error remains, try resetting the device by:
- Locate the reset hole (see image below).
![]()
2. With a paper clip, do a gentle press for 1 second on the reset button (Note! You may have to tilt the pin a little downwards).
If you see a “PadLock” symbol in the upper display, press one more time on the reset button.
If the Beacon still doesn’t start or the display is showing a wrench and a manual, then please contact your local sales representative or distributor or support@osstell.com.
추가 관심 제품
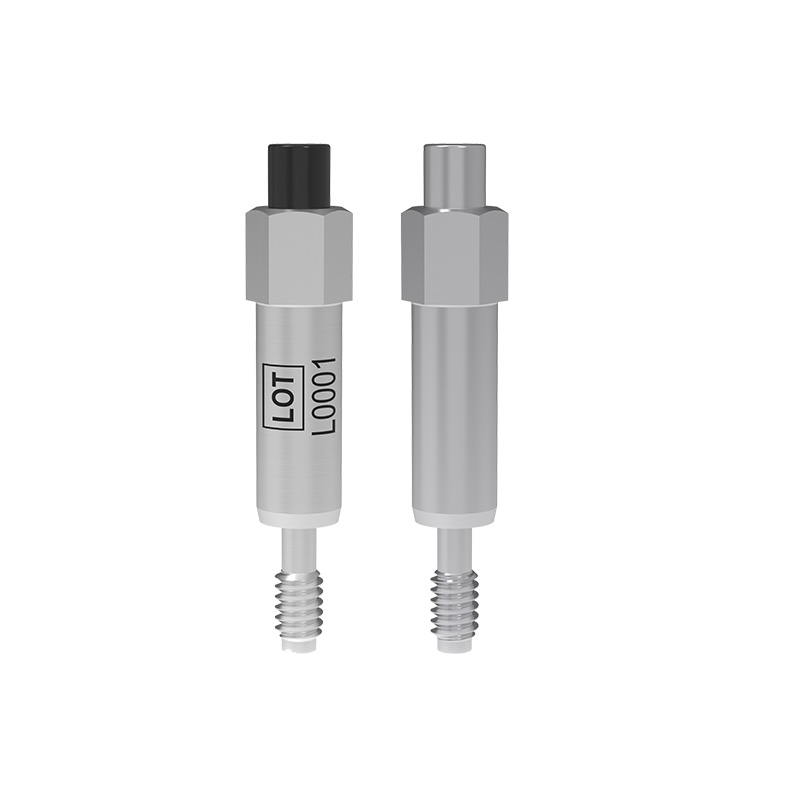
SmartPeg
SmartPeg™는 임플란트에 부착되어 측정 기기인 Osstell IDx, Osstell Beacon 또는 Osstell ISQ와 함께 사용됩니다.
OsstellConnect
OsstellConnect는 임상의가 데이터를 사용하여 치과 임플란트 치료를 향상시킬 수 있는 새로운 방법을 제공하는 무료 클라우드 기반 솔루션입니다.