機器の登録方法
患者様の作成方法
測定の追加方法
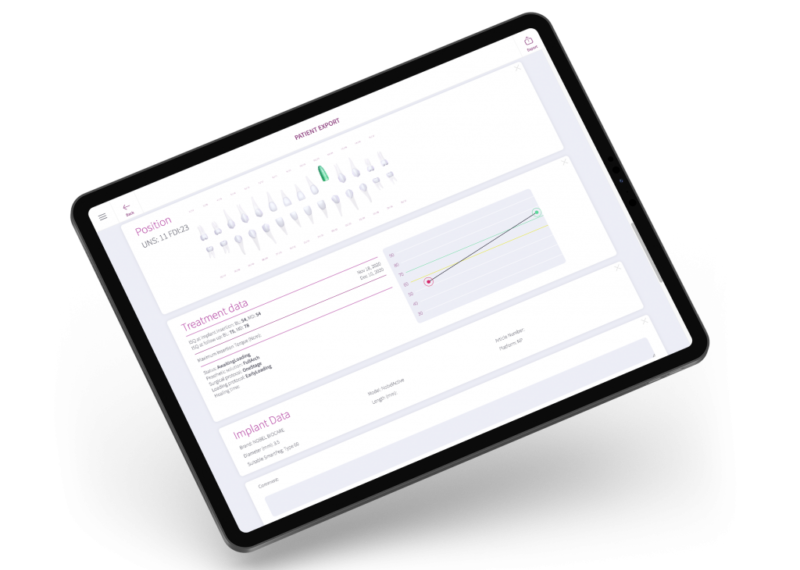
PDFを出力する方法
安定性の発展を視覚化する方法
統計をレビューする方法
Frequently asked questions
Osstell Beacon
• To find your registration code, please make sure that you have already installed the Beacon Gateway. If you have not installed it yet, please navigate to your clinic in your account, click the instruments tab and download the gateway. Install it.
• Take your instrument in hand. It is now connecting to OsstellConnect and you should see a symbol animating. Please note that it can take a few seconds.
• When connected, the symbol stops animating.
• The registration code is now displayed on the lower screen of your instrument.
Osstell IDx
• When turning on your Osstell IDx for the first time, you will be prompted to select language, time zone, date and time.
• After that, you will need to set up a 4-digit pin code and a backup password. The backup password is needed when restoring to a backup, so please note it down and save it in a safe place.
• Your registration code is now displayed on your Osstell IDx.
You can find the serial number on the back of your instrument.
Navigate to your clinic in your account. Select the instrument tab. Click on Download firmware.
Download instructions:
• Wait for the download to complete (could take a while depending on your connection)
• Copy the .m2f binary file to a USB memory stick
• Insert the memory stick in your IDx while it is running
• Follow instructions on the IDx display
Note: you cannot open or view the .m2f file
You can also check this guide
Osstell IDxがインターネットに接続されていれば、保存されているデータはOsstellConnectアカウントに自動的にアップロードされます。機器をインターネットに接続する方法については、こちらをご覧下さい。
例えば、USBメモリなどにバックアップを作成することも可能です。詳しくは、こちらをご覧下さい。
https://osstell.com/app/uploads/How-to-connect-to-the-Internet-6.0.pdf
• To document an implant failure, go to your patients records. Select the patient, then select the tooth. Click ‘Mark as failed’. Choose the type of failure (early or late failure), fill in the failure date. Choose the reason for failure. Click ‘Mark as failed’.
• You can access the history of the implant failure by navigating to the history tab. Click the tab ‘Failed’ to see all information related to the treatment and the failure.
• A history symbol is displayed on the tooth with a failed implant.
You can record ISQ at abutment level in OsstellConnect, but it is important to follow the correct clinical measurement procedure to obtain accurate values.
How to measure ISQ at abutment level
- Perform an implant level measurement first, before placing the abutment.
- Measure again at abutment level during the same session, using a SmartPeg made for abutment level measuring.
- Determine the offset by noting the difference between implant level and abutment level ISQ. This offset remains stable throughout healing and should be used when interpreting follow-up measurements.
- For all subsequent visits, measure on the abutment and apply the same offset to understand the true implant ISQ.
How to record the measurement in OsstellConnect:
- Go to the patient’s register, select the patient and the implant in the tooth chart. Click ‘Add abutment’, choose the abutment, and save.
- Select ‘Measure stability’ and choose ‘Abutment’ under Measurement level. Measure on the abutment as you would at implant level and save.
- To review the stability trend, open the Stability tab and toggle ‘Show abutment’. You can also enable ‘Show details’ to view buccal–lingual and mesial–distal ISQ values.
For a more detailed explanation and clinical guidance, see our blog post here.
Simply navigate to your patient records. Select the patient. Click ‘edit’ on the top right corner. Edit the data and save.
まず初めに、Beacon Gatewayがインストールされていることを確認します。まだインストールされていない場合は、アカウントでクリニックに進み、[器具] タブをクリックして、Gatewayをダウンロードして下さい。Gatewayをインストールします。
- Osstell KeyをコンピュータのUSBポートに接続します。
- インスツルメントを手に持ちます。OsstellConnectとの接続が開始され、次のマークのアニメーションが表示されるはずです。これには数秒かかることがあります。
- 接続が完了すると、マークのアニメーションが止まります。
- 患者記録に進みます。
- 初回の測定の場合は、患者を作成します。患者データを入力し、保存します。[新規治療] をクリックし、治療情報を入力します。[インプラントを追加] をクリックし、インプラントデータを入力して保存します。[安定性を測定] をクリックします。
- フォローアップ測定の場合は、患者を選択してから、歯式チャートで歯を選択します。[安定性を測定] をクリックします。
- 頬舌方向(頬側-舌側)で測定します。ISQ値がOsstellConnectに表示されます。
- 近遠心方向で測定します。ISQ値がOsstellConnectに表示されます。
- 治療に関する情報を入力し、保存します。
Yes, simply navigate to your patient records. Select the patient. Select the implant you want to edit on the tooth chart. Select the tab ‘Implant & abutment’. Click on the pen icon to edit. Edit implant data. Save.
はい。詳細な分析のためにすべてのデータをExcelファイルにエクスポートできます。患者記録に進み、[CSVエクスポート] をクリックして下さい。ファイルがダウンロード項目に表示されます。
エクスポートしたデータは、GDPRやHIPAAなどの適用されるデータ保護規制を遵守して取り扱って下さい。
Yes, simply navigate to your patient records. Select the patient you would like to delete. Click delete in the upper right corner. Confirm that you want to delete the patient and all data. Please note that it will be permanently removed from your account.
Yes, simply navigate to your patient records. Select the patient. Select the implant. Go to the stability tab. Click on the edit icon by the measurement you would like to delete. Click delete. Please note that the measurement will be permanently removed from the patient chart.
サポートが必要ですか?
フォームにご記入をいただければすぐにご連絡いたします。お待ちしております。