FAQ

Support

Preguntas frecuentes

Obtenga más información sobre nuestros productos, la escala ISQ y su uso, OsstellConnect, la tecnología Osstell y mucho más.
Preguntas sobre OsstellConnect

How do I measure and record ISQ on an abutment?

You can record ISQ at abutment level in OsstellConnect, but it is important to follow the correct clinical measurement procedure to obtain accurate values.

How to measure ISQ at abutment level

  1. Perform an implant level measurement first, before placing the abutment.
  2. Measure again at abutment level during the same session, using a SmartPeg made for abutment level measuring.
  3. Determine the offset by noting the difference between implant level and abutment level ISQ. This offset remains stable throughout healing and should be used when interpreting follow-up measurements.
  4. For all subsequent visits, measure on the abutment and apply the same offset to understand the true implant ISQ.

How to record the measurement in OsstellConnect:

  1. Go to the patient’s register, select the patient and the implant in the tooth chart. Click ‘Add abutment’, choose the abutment, and save.
  2. Select ‘Measure stability’ and choose ‘Abutment’ under Measurement level. Measure on the abutment as you would at implant level and save.
  3. To review the stability trend, open the Stability tab and toggle ‘Show abutment’. You can also enable ‘Show details’ to view buccal–lingual and mesial–distal ISQ values.

For a more detailed explanation and clinical guidance, see our blog post here.

How should I document an implant failure?

• To document an implant failure, go to your patients records. Select the patient, then select the tooth. Click ‘Mark as failed’. Choose the type of failure (early or late failure), fill in the failure date. Choose the reason for failure. Click ‘Mark as failed’.

• You can access the history of the implant failure by navigating to the history tab. Click the tab ‘Failed’ to see all information related to the treatment and the failure.

• A history symbol is displayed on the tooth with a failed implant.

¿Cómo puedo subir datos desde mi Osstell IDx a OsstellConnect?

Los datos de Osstell IDx se cargan automáticamente en su cuenta de OsstellConnect si tiene conexión a Internet. Para conectar su dispositivo a Internet, siga las instrucciones que se indican aquí.

Tenga en cuenta que también puede crear copias de seguridad, por ejemplo, en una memoria USB. Siga estas instrucciones.

¿Cómo puedo conectar mi Osstell Beacon a OsstellConnect y registrar datos directamente?

Antes de empezar, asegúrese de que ya tiene instalado Beacon Gateway. Si aún no lo ha instalado, vaya a la sección de su clínica en su cuenta, haga clic en la pestaña «Instruments» (Instrumentos), descargue Gateway e instálelo.

  • Conecte Osstell Key a un puerto USB de su ordenador.
  • Tome el instrumento en la mano. Ahora se está conectando a OsstellConnect y debería ver el siguiente símbolo en movimiento. Tenga en cuenta que puede tardar unos segundos.
  • Cuando está conectado, el símbolo deja de moverse.
  • Vaya a los registros de los pacientes.
    • Si se trata de la primera medición, cree un paciente. Rellene los datos del paciente y guarde. Haga clic en «New Treatment» (Nuevo tratamiento) y rellene la información del tratamiento. Haga clic en «Add implant» (Añadir implante), rellene los datos del implante y guarde. Haga clic en «Measure stability» (Medir estabilidad).
    • Si se trata de una medición de seguimiento, seleccione al paciente y, a continuación, el diente en el odontograma. Haga clic en «Measure stability» (Medir estabilidad).
  • Mida en la dirección bucolingual. El valor ISQ ya aparece en OsstellConnect.
  • Mida en la dirección mesiodistal. El valor ISQ ya aparece en OsstellConnect.
  • Rellene la información sobre el tratamiento y guarde.
Can I delete a measurement?

Yes, simply navigate to your patient records. Select the patient. Select the implant. Go to the stability tab. Click on the edit icon by the measurement you would like to delete. Click delete. Please note that the measurement will be permanently removed from the patient chart.

Can I delete a patient?

Yes, simply navigate to your patient records. Select the patient you would like to delete. Click delete in the upper right corner. Confirm that you want to delete the patient and all data. Please note that it will be permanently removed from your account.

¿Puedo exportar todos mis datos?

Sí, puede exportar todos sus datos a un archivo de Excel para analizarlos más a fondo. Solo tiene que ir a los registros de los pacientes y pulsar «CSV export» (Exportar en CSV). El archivo aparecerá en su carpeta de descargas.

Asegúrese de que los datos exportados se traten de conformidad con la normativa aplicable en materia de protección de datos, como el RGPD o la HIPAA.

Can I manually edit implant data?

Yes, simply navigate to your patient records. Select the patient. Select the implant you want to edit on the tooth chart. Select the tab ‘Implant & abutment’. Click on the pen icon to edit. Edit implant data. Save.

How can I edit patient data?

Simply navigate to your patient records. Select the patient. Click ‘edit’ on the top right corner. Edit the data and save.

How can I find the serial number (SN)?

You can find the serial number on the back of your instrument.

How can I find my registration code?

Osstell Beacon
• To find your registration code, please make sure that you have already installed the Beacon Gateway. If you have not installed it yet, please navigate to your clinic in your account, click the instruments tab and download the gateway. Install it.
• Take your instrument in hand. It is now connecting to OsstellConnect and you should see a symbol animating. Please note that it can take a few seconds.
• When connected, the symbol stops animating.
• The registration code is now displayed on the lower screen of your instrument.

Osstell IDx
• When turning on your Osstell IDx for the first time, you will be prompted to select language, time zone, date and time.
• After that, you will need to set up a 4-digit pin code and a backup password. The backup password is needed when restoring to a backup, so please note it down and save it in a safe place.
• Your registration code is now displayed on your Osstell IDx.

Questions about Smartpegs

Questions about Smartpegs

Can the reusable SmartPeg be sterilised according to the Prion cycle?

Yes, it can be sterilised with a Prion cycle at 134 °C for 18 minutes.

How should I mount the SmartPeg on the implant?

Whether you are using a single-use or a reusable SmartPeg, it should always be installed using the SmartPeg Mount and tightened to approximately 4–6 Ncm – typically described as finger tight. This ensures proper seating and accurate ISQ measurements without risking damage to the implant or the SmartPeg.

Can I mix single-use and reusable SmartPegs in the same treatment session?

Yes. You can mix single-use and reusable SmartPegs during the same treatment session. The only requirement is that you use the correct SmartPeg Type number for the specific implant or abutment you are measuring.

Whether the SmartPeg is single-use or reusable does not affect the measurement.

Does a reusable SmartPeg provide the same ISQ values as a single use SmartPeg?

Yes, as long as its integrity and performance are maintained.

Osstell is also the only company offering both a sterile single-use and a reusable SmartPeg made of aluminium, supported by more than 1,500 published studies on the ISQ method.

With the Osstell original ISQ scale and SmartPegs, no conversion tables or correction factors are needed. The measured ISQ value is the true value, regardless of whether you use a single use or a reusable SmartPeg.

How are the different SmartPegs packed?

SmartPegs are supplied in different packaging formats depending on whether they are single-use or reusable:

Single-use SmartPegs

  • Delivered sterile.
  • Supplied in boxes of 5 pieces, in a single sterile barrier system with protective outer packaging.
  • Intended for one treatment session only and must not be reused.

Reusable SmartPegs

  • Delivered nonsterile in individual packaging.
  • Must be cleaned, disinfected and sterilized before the first clinical use and after every subsequent use. (See quickguide at osstell/ifu).

SmartPeg Mount

  • Delivered nonsterile with the instrument.
  • Can be purchased separately, in package of 5.
  • Must also be cleaned, disinfected and sterilized before use and between patients. (See quickguide at osstell/ifu).
Is there a visual difference between the single-use and reusable SmartPeg?

Yes. The reusable and single use SmartPegs are designed so they can be easily distinguished visually:

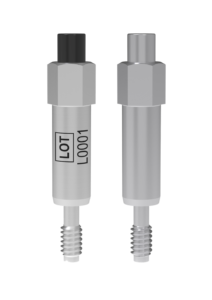
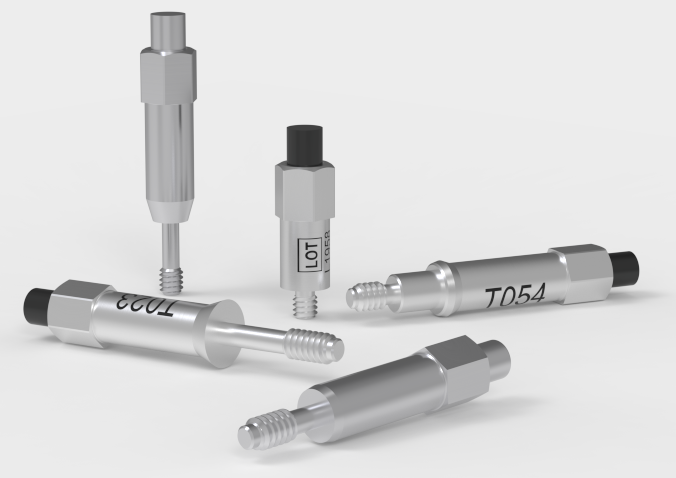
  • The single-use SmartPeg is supplied sterile, has an aluminium coloured (non coloured) magnet, and does not include any laser marked identifiers on the body.
  • The reusable SmartPeg has a black magnet on top and carries laser marked Type and LOT numbers on the body for identification and traceability.

How many times can the SmartPeg be used?

The reusable SmartPeg can be used for up to 20 reprocessing cycles, as long as its integrity and performance are maintained.

If inspection reveals wear, deformation, corrosion, damaged threads, or any loss of functional compatibility, the SmartPeg must be discarded, even if it has been processed fewer than 20 times.

The single-use SmartPeg is intended for one treatment session only and must not be reprocessed.

Why can the reusable SmartPeg be cleaned and sterilised when the single-use SmartPeg cannot, even though both are made of aluminium?

The reusable SmartPeg is engineered with special protective surface coating – one on the SmartPeg body and another black protective coating on the magnet. These coatings provide resistance to moisture, cleaning chemicals, wear, and corrosion, ensuring that the SmartPeg maintains its performance throughout the validated number of reprocessing cycles.

The reusable SmartPeg can easily be distinguished from the single use version: it has a black magnet, and its LOT and Type number are laser marked on the body for clear identification.

How should the reusable SmartPeg and the SmartPeg Mount be cleaned and sterilized?

Prior to the first clinical use, and after each use the reusable products must be cleaned, disinfected and sterilized according to the instructions in the quickguide that is found here: Osstell/ifu

How do I measure and record ISQ on an abutment?

You can record ISQ at abutment level in OsstellConnect, but it is important to follow the correct clinical measurement procedure to obtain accurate values.

How to measure ISQ at abutment level

  1. Perform an implant level measurement first, before placing the abutment.
  2. Measure again at abutment level during the same session, using a SmartPeg made for abutment level measuring.
  3. Determine the offset by noting the difference between implant level and abutment level ISQ. This offset remains stable throughout healing and should be used when interpreting follow-up measurements.
  4. For all subsequent visits, measure on the abutment and apply the same offset to understand the true implant ISQ.

How to record the measurement in OsstellConnect:

  1. Go to the patient’s register, select the patient and the implant in the tooth chart. Click ‘Add abutment’, choose the abutment, and save.
  2. Select ‘Measure stability’ and choose ‘Abutment’ under Measurement level. Measure on the abutment as you would at implant level and save.
  3. To review the stability trend, open the Stability tab and toggle ‘Show abutment’. You can also enable ‘Show details’ to view buccal–lingual and mesial–distal ISQ values.

For a more detailed explanation and clinical guidance, see our blog post here.

Why do I need to take two measurements at the same occasion?

ISQ should always be measured in two directions, because implant stability can vary depending on the amount of surrounding bone in different directions. Measuring from two angles ensures that both the most and the least stable directions are captured.
To do this, take one measurement in the buccal-lingual direction and one in the mesial-distal direction. These two ISQ values represent the different stability directions. Sometimes the values are identical; sometimes they differ.
If the two measurements differ, always rely on the lowest ISQ value, as it reflects the weakest direction and therefore provides the most clinically relevant information about implant stability.

Do I need a torque device to tighten the SmartPeg correctly?

No. A torque device should not be used to tighten the SmartPeg.

SmartPegs should always be mounted using the SmartPeg Mount and tightened to approximately 4–6 Ncm, which is typically described as finger tight.

This ensures the SmartPeg is seated correctly without risking damage to the implant connection.

How does the Osstell technology work?

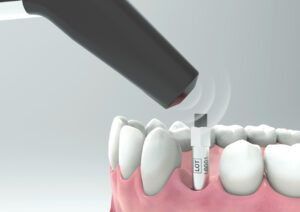
Osstell measures implant stability using Resonance Frequency Analysis (RFA). The small SmartPeg that you attach to the implant has a tiny magnet on top. When the probe sends magnetic pulses, the SmartPeg starts to vibrate – similar to a very small tuning fork.
How it works:

  1. The instrument tip sends magnetic pulses
    These pulses make the SmartPeg vibrate without touching it.
  2. The vibration changes depending on how stable the implant is
    – A stable implant (good bone support) makes the SmartPeg vibrate faster.
    – A less stable implant makes it vibrate slower.
  3. The device converts this vibration into an ISQ value
    – Higher stability → higher frequency → higher ISQ
    – Lower stability → lower frequency → lower ISQ

It takes less than a second, and the ISQ value is shown immediately.

Does the way the SmartPeg is tightened affect the ISQ value?

Yes. The ISQ value can be affected if the SmartPeg is not mounted correctly.

For accurate measurements, the SmartPeg should be attached finger tight using the SmartPeg Mount, which corresponds to about 4–6 Ncm.

At this level, the SmartPeg has firm, stable contact with the implant, and the resulting ISQ value is consistent – typically within ±2 ISQ units.

  • If the SmartPeg is not fully seated:
    The contact becomes unstable, and the ISQ value can appear artificially low, or you don’t receive any value.
  • If too much force is applied:
    Overtightening does not improve accuracy. It may damage the SmartPeg threads.
    – A reusable SmartPeg may be damaged so it cannot be used again.
    – A single use or reusable SmartPeg may have its threads deformed, which can lead to inaccurate measurements during that session or, in worst case a broken SmartPeg.

In short: finger tight (4–5 Ncm) is enough to ensure stable contact and reliable ISQ readings.

Which Osstell products can be autoclaved?

The following products may be autoclaved (over-pressurized steam up to 135 deg Celsius):

  • SmartPeg Mount
  • Reusable SmartPeg
  • Probe (IDx)

Please note that single-use SmartPegs are disposable and cannot be autoclaved!

How do I select the correct SmartPeg for my implant?

Different implants require specific SmartPegs to ensure accurate measurement. Each SmartPeg is matched to a particular implant system and connection type.

You can find the correct SmartPeg for your implant in the SmartPeg Reference Guide – click here to access it.

Preguntas sobre Osstell Beacon

Preguntas sobre Osstell Beacon

¿Qué garantía tienen los instrumentos Osstell?

Osstell Beacon: 2 años
W&H Osstell Classic: 1 año

¿Cómo se limpia el instrumento?

Antes de cada uso, humedezca una gasa o un paño suave con un limpiador de superficies recomendado (véase la lista más abajo) y limpie todo el instrumento.

Limpiadores aceptables:

  • Alcohol isopropílico al 70 %
  • Detergentes enzimáticos con pH neutro que hagan poca espuma, por ejemplo:
    • Toallitas desinfectantes BePro, REF. 19500102, www.wh.com (se pueden pedir a W&H Sterilization)
    • Medizime LF
    • Enzol

No use:

  • Limpiadores o desinfectantes con base ácida o fenólica
  • Cualquier tipo de detergente alcalino fuerte, incluidos los jabones de manos y lavavajillas
  • Limpiadores con base de lejía
  • Limpiadores con base de peróxido de hidrógeno
  • Limpiadores abrasivos
  • Limpiadores con base de acetona o de hidrocarburo
  • MEK (metiletilcetona)
  • Birex
  • Gluteraldehído
  • Limpiadores con base de sales de cloruro de amonio cuaternario

El instrumento no requiere mantenimiento regular. En caso de avería del instrumento, póngase en contacto con el representante de ventas o distribuidor local para obtener más instrucciones.

How do I measure and record ISQ on an abutment?

You can record ISQ at abutment level in OsstellConnect, but it is important to follow the correct clinical measurement procedure to obtain accurate values.

How to measure ISQ at abutment level

  1. Perform an implant level measurement first, before placing the abutment.
  2. Measure again at abutment level during the same session, using a SmartPeg made for abutment level measuring.
  3. Determine the offset by noting the difference between implant level and abutment level ISQ. This offset remains stable throughout healing and should be used when interpreting follow-up measurements.
  4. For all subsequent visits, measure on the abutment and apply the same offset to understand the true implant ISQ.

How to record the measurement in OsstellConnect:

  1. Go to the patient’s register, select the patient and the implant in the tooth chart. Click ‘Add abutment’, choose the abutment, and save.
  2. Select ‘Measure stability’ and choose ‘Abutment’ under Measurement level. Measure on the abutment as you would at implant level and save.
  3. To review the stability trend, open the Stability tab and toggle ‘Show abutment’. You can also enable ‘Show details’ to view buccal–lingual and mesial–distal ISQ values.

For a more detailed explanation and clinical guidance, see our blog post here.

How can I find the serial number (SN)?

You can find the serial number on the back of your instrument.

How can I find my registration code?

Osstell Beacon
• To find your registration code, please make sure that you have already installed the Beacon Gateway. If you have not installed it yet, please navigate to your clinic in your account, click the instruments tab and download the gateway. Install it.
• Take your instrument in hand. It is now connecting to OsstellConnect and you should see a symbol animating. Please note that it can take a few seconds.
• When connected, the symbol stops animating.
• The registration code is now displayed on the lower screen of your instrument.

Osstell IDx
• When turning on your Osstell IDx for the first time, you will be prompted to select language, time zone, date and time.
• After that, you will need to set up a 4-digit pin code and a backup password. The backup password is needed when restoring to a backup, so please note it down and save it in a safe place.
• Your registration code is now displayed on your Osstell IDx.

¿Cómo debo empezar?

Empiece cargando el instrumento durante unas 3 horas para garantizar un rendimiento óptimo.

El Osstell Beacon se enciende automáticamente al moverlo, muestra el estado de la batería y, a continuación, está listo para realizar mediciones en la dirección BL (bucolingual).

Acerque el instrumento a un SmartPeg o a un TestPeg para iniciar la medición. Una señal acústica confirma la medición y se muestra el valor ISQ junto con un indicador de estabilidad en color (rojo, amarillo, verde).

Durante la puesta en marcha, aparece un código de OsstellConnect hasta que se registre el instrumento. Puede registrar el instrumento aquí: Registrar en OsstellConnect.

El instrumento se apaga automáticamente tras 60 segundos sin movimiento.

How do I measure with the Osstell Beacon?

Video on how to measure: Measure with Osstell Beacon

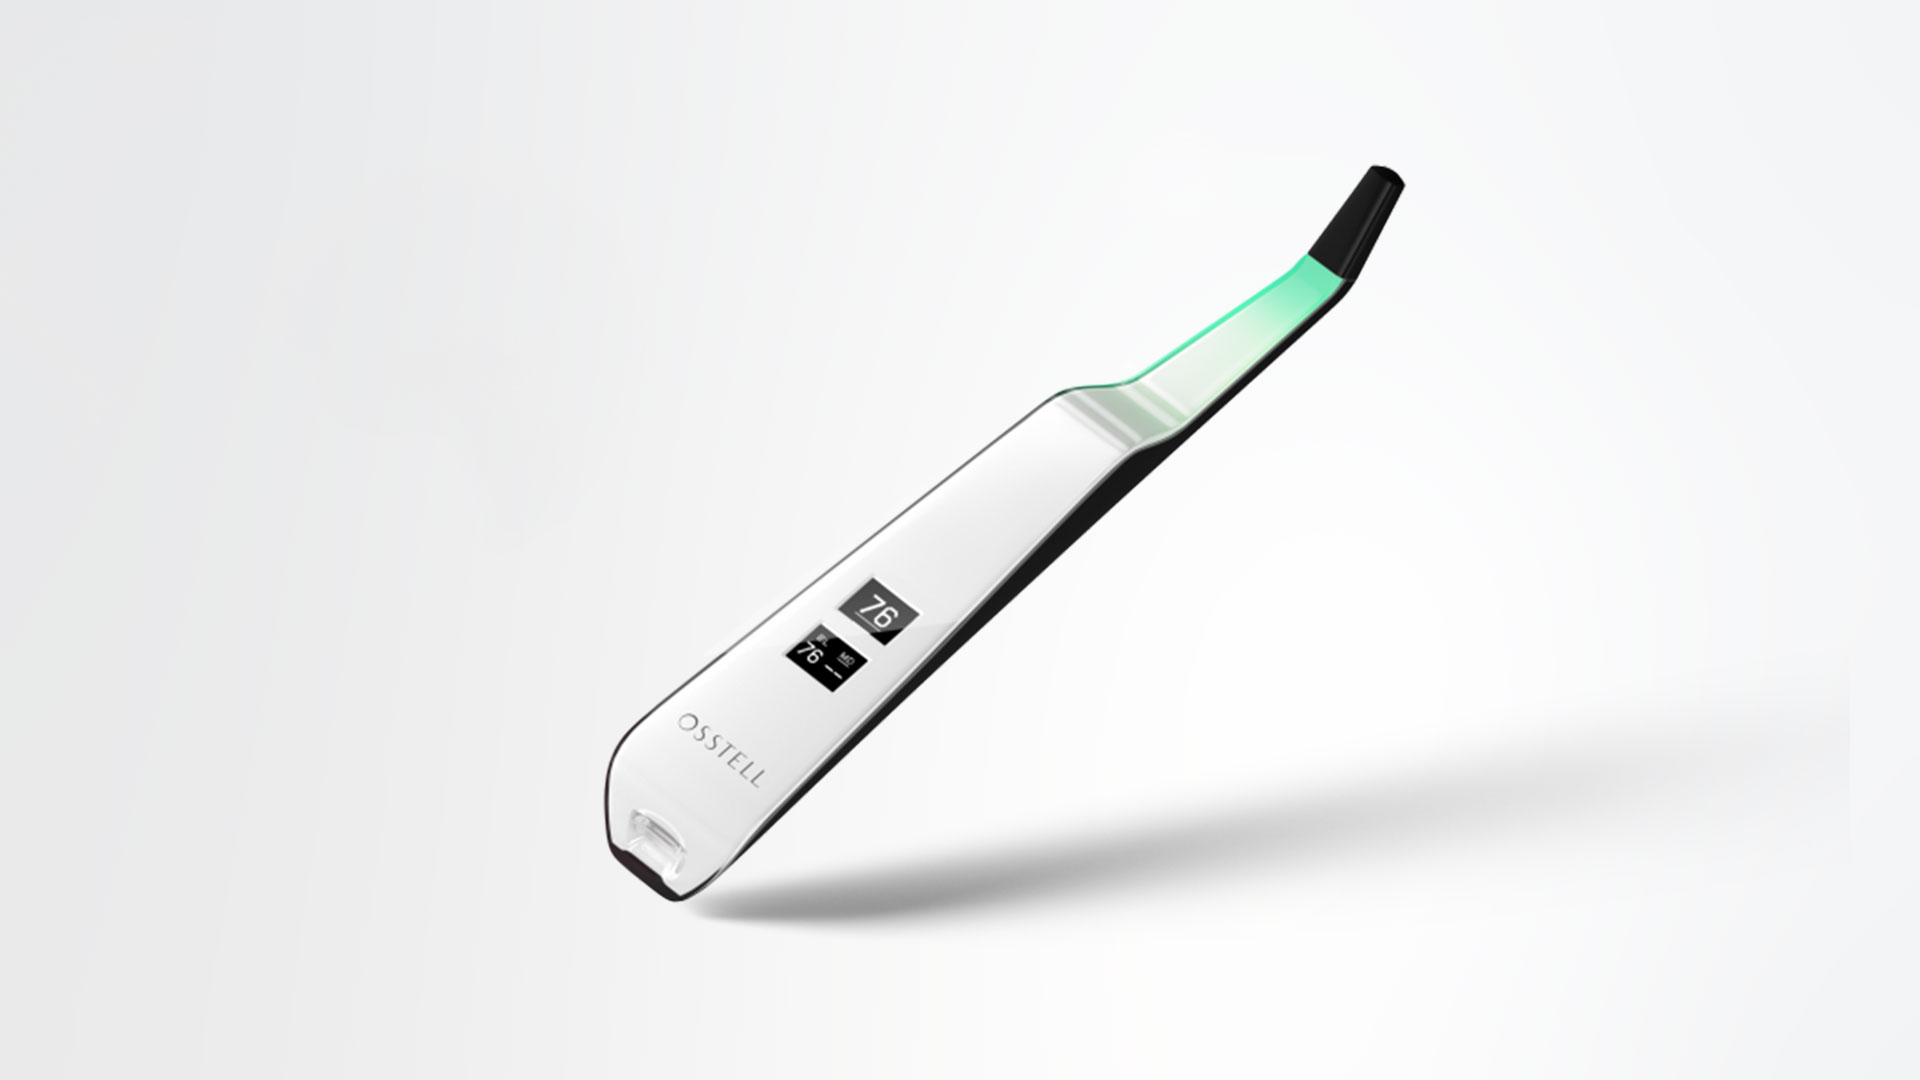
1. Activate the Osstell Beacon by picking it up. The instrument will start-up and after showing the battery status, the instrument will be ready for measurement in the BL (Buccal – Lingual) direction, which is prompted in the upper display as well as optimal angle towards the Smartpeg.

2. Place a barrier sleeve over the Osstell beacon instrument.

3. Place the SmartPeg into the SmartPeg Mount. The SmartPeg is magnetic, and the SmartPeg Mount will hold the SmartPeg. See fig 2. Attach the SmartPeg to the implant or abutment by screwing the SmartPeg Mount using finger force of approximately 4-6 Ncm. Do not over-tighten, to avoid damaging the SmartPeg threads.

4. Hold the instrument tip close (2-4mm) to the top of the SmartPeg without touching it. Sometimes, you will need to go as close as 1 mm. An audible sound indicates when measurement has started, and measured data will be shown in the upper display combined with a colored light indication below the tip.

5. Bring the instrument out of the mouth to clearly read the ISQ value and the colored indication. The measured ISQ values will be displayed in the upper display for a couple of seconds and then switch to be ready for measurement in mesial-distal direction.

6. Repeat step 4 and the sequence starts over and the Osstell Beacon is ready for measurement in the BL (Buccal- Lingual) direction again.

7. When all measurements are performed, remove the SmartPeg by using the SmartPeg Mount. The instrument is automatically turned off after 60 seconds of inactivity.

¿Por qué al medir obtengo valores inesperados o no consigo ninguna lectura?

Algunas posibles explicaciones son:


SmartPeg reutilizado: Los SmartPegs son desechables y solo deben utilizarse para una o varias mediciones en una sesión de tratamiento, para un solo paciente. La reutilización repetida puede dar lugar a lecturas falsas debido al desgaste de las roscas blandas de aluminio del SmartPeg.

Tipo de SmartPeg incorrecto seleccionado para el implante: Consulte la lista de referencia de SmartPeg, osstell.com/smartpegguide

Hueso o tejido blando entre SmartPeg e implante: Asegúrese de limpiar la conexión protésica del implante antes de colocar el SmartPeg.

Interferencias electromagnéticas: Retire la fuente de las interferencias electromagnéticas.

La sonda está demasiado lejos del SmartPeg: Sostenga la sonda a 2-4 mm del SmartPeg.

How do I get started?

Although it is possible to use the Osstell Beacon directly, depending on the status of the built-in rechargeable battery, it is recommended to charge the battery for at least 3 hours before using the Osstell Beacon instrument.

The Osstell Beacon is activated by a built-in motion sensor. As soon as the motion sensor detects movement, the Osstell Beacon will start-up and shortly show battery status and then be ready for measurement in the BL (Buccal – Lingual) direction, which is indicated in the upper display.

The Osstell Beacon will start to measure, indicated by an audible sound, when near an Osstell SmartPeg or Test peg due to a built-in magnetic detector that senses the magnet on the top of the Osstell SmartPeg/TestPeg. Measured data will be shown in the upper display combined with a colored light indication below the tip.

The red, yellow and green color indicates if the measured ISQ value corresponds to a low, medium or high implant stability according to the ISQ scale guidance, click here for more information.

¿Cómo realizo una medición con Osstell Beacon?

Vídeo sobre cómo realizar una medición: Medir con Osstell Beacon

  1. Para activar Osstell Beacon, levántelo. El instrumento se pondrá en marcha y, después de mostrar el estado de la batería, estará listo para la medición en la dirección BL (bucolingual), que aparece en la pantalla superior junto con el ángulo óptimo hacia el SmartPeg.
  2. Coloque una funda protectora sobre el instrumento Osstell Beacon.
  3. Coloque el SmartPeg en el SmartPeg Mount. El SmartPeg es magnético y el SmartPeg Mount lo sostendrá. Consulte la fig. 2. Conecte el SmartPeg al implante o al pilar enroscando el SmartPeg Mount con los dedos y apretando hasta alcanzar un par de apriete de aproximadamente 4-6 N cm. No lo apriete demasiado para evitar dañar las roscas del SmartPeg.
  4. Sostenga la punta del instrumento cerca (2-4 mm) de la parte superior del SmartPeg sin tocarla. A veces, tendrá que acercarse hasta 1 mm. Un sonido audible indica que se ha iniciado la medición y los datos de la medición se mostrarán en la pantalla superior junto con una indicación luminosa de color debajo de la punta.
  5. Retire el instrumento de la boca para leer claramente el valor ISQ y la indicación de color. Los valores ISQ medidos aparecerán en la pantalla superior durante un par de segundos y luego cambiará para prepararse para la medición en dirección mesiodistal.
  6. Repita el paso 4, la secuencia vuelve a iniciarse y Osstell Beacon estará preparado para volver a realizar la medición en la dirección BL (bucolingual).
  7. Después de realizar todas las mediciones, retire el SmartPeg utilizando el SmartPeg Mount. El instrumento se apaga automáticamente después de 60 segundos de inactividad.
How do I measure with the Osstell Beacon?

1. Activate the Osstell Beacon by picking it up. The instrument will start-up and after showing the battery status, the instrument will be ready for measurement in the BL (Buccal – Lingual) direction, which is prompted in the upper display as well as optimal angle towards the Smartpeg.

2. Place a barrier sleeve over the Osstell beacon instrument.

3. Place the SmartPeg into the SmartPeg Mount. The SmartPeg is magnetic, and the SmartPeg Mount will hold the SmartPeg. See fig 2. Attach the SmartPeg to the implant or abutment by screwing the SmartPeg Mount using finger force of approximately 4-6 Ncm. Do not over-tighten, to avoid damaging the SmartPeg threads.

4. Hold the instrument tip close (2-4mm) to the top of the SmartPeg without touching it. Sometimes, you will need to go as close as 1 mm. An audible sound indicates when measurement has started, and measured data will be shown in the upper display combined with a colored light indication below the tip.

5. Bring the instrument out of the mouth to clearly read the ISQ value and the colored indication. The measured ISQ values will be displayed in the upper display for a couple of seconds and then switch to be ready for measurement in mesial-distal direction.

6. Repeat step 4 and the sequence starts over and the Osstell Beacon is ready for measurement in the BL (Buccal- Lingual) direction again.

7. When all measurements are performed, remove the SmartPeg by using the SmartPeg Mount. The instrument is automatically turned off after 60 seconds of inactivity.

Why is it that I get unexpected values or no readings when measuring?

Possible explanations include:

Re-Used SmartPeg: The SmartPegs are disposable and should only be used for one or multiple measurement at one treatment session, for a single patient only. Repeated re-use may result in false readings due to wear and tear of the soft aluminum SmartPeg threads.

Wrong SmartPeg type selected for the implant: See SmartPeg reference list, osstell.com/smartpegguide

Bone or soft tissue in between SmartPeg and Implant: Make sure to clean the Implant prosthetic connection before attaching the SmartPeg.

Electromagnetic interference: Remove the source of electromagnetic interference.

Probe is held too far away from the SmartPeg: Hold the probe 2-4 mm away from the SmartPeg.

Do I need to be connected to WiFi?

You can have your Osstell Beacon online connected to OsstellConnect for data collection, but it is not a requirement. OsstellConnect is an online tool for statistical analysis and valuable insights based on your data. Before you can start using data connection to OsstellConnect you have to register your Osstell Beacon. The serial number can be found on the back of the instrument. For registration assistance and features of data connection to OsstellConnect, please visit osstellconnect.com/beacon

What is the warranty on the Osstell Beacon?

2 years

How do I clean the Osstell Beacon?

Before each use, moisten a gauze or soft cloth with an acceptable (see list below) surface disinfectant and wipe the whole Osstell Beacon instrument. Note! Do not autoclave the Osstell Beacon instrument. Routinely check the surface of the instrument tip and overall surface for possible cracks and resins.

Acceptable Cleaners:
o Isopropyl alcohol
o Ethyl alcohol-based cleaners

Do not use:
o Strong alkali detergent of any type, including hand soaps and dish soaps Bleach based cleaners
o Hydrogen Peroxide based cleaners Abrasive Cleansers
o Acetone or hydrocarbon based cleaners MEK (Methyl Ethyl Ketone)
o Birex Gluteraldehyde
o Quaternary Ammonium Chloride salt-based cleaners

How do I engage / disengage transportation mode?

The Osstell Beacon is delivered from factory in a “transport” mode, where the built-in motion sensor is deactivated. To deactivate the transport mode and start charging, connect the small USB connector of the Osstell USB cable to wide end of the instrument. Connect the large USB connector to a standard USB outlet of a PC, laptop or charger.

Do I need to be connected to Wi‑Fi?

No, a Wi‑Fi connection is not required to use your Osstell Beacon. You can measure implant stability and document ISQ values manually in your patient journal or in OsstellConnect at a later stage.
If connected, the Osstell Beacon can communicate wirelessly with OsstellConnect, allowing measurements to be transferred and recorded automatically.
OsstellConnect is an online tool used for data collection, statistical analysis and clinical insights based on your measurements.
To use the data connection, your Osstell Beacon must first be registered. The serial number can be found on the back of the instrument. For registration guidance and more information, please visit https://osstellconnect.com/register

How do I switch the Osstell Beacon from transport mode to use mode?

The Osstell Beacon is delivered in transportation mode with the motion sensor deactivated. To switch modes, briefly connect the USB cable to the instrument and a USB port on a computer for a few seconds, then disconnect.

What should I do if the Osstell Beacon doesn’t start or when the display is showing a wrench and a manual?

Charge the Beacon for at least 30 min in room temperature, then try again. If the error remains, try resetting the device by:

1. Identify the Beacon reset pin on the picture below.

2. With a paper clip, do a gentle press for 1 second on the reset button (Note! You may have to tilt the pin a little downwards).
If you see a “PadLock” symbol in the upper display, press one more time on the reset button.


If the Beacon still doesn’t start or the display is showing a wrench and a manual, then please contact your local sales representative or distributor or support@osstell.com.

Why do I need to take two measurements at the same occasion?

ISQ should always be measured in two directions, because implant stability can vary depending on the amount of surrounding bone in different directions. Measuring from two angles ensures that both the most and the least stable directions are captured.
To do this, take one measurement in the buccal-lingual direction and one in the mesial-distal direction. These two ISQ values represent the different stability directions. Sometimes the values are identical; sometimes they differ.
If the two measurements differ, always rely on the lowest ISQ value, as it reflects the weakest direction and therefore provides the most clinically relevant information about implant stability.

¿Hay estudios que demuestren el método de Osstell?

Actualmente existen miles de artículos publicados en revistas científicas en los que se han utilizado instrumentos Osstell en el estudio. Estos resúmenes se pueden encontrar en nuestra base de datos de búsqueda en «Resources/Scientific database» (Recursos/Base de datos científica).

La escala ISQ de Osstell se basa en los resultados de estos estudios, todos ellos realizados con instrumentos de Osstell y SmartPegs de aluminio.

How does the Osstell technology work?

Osstell measures implant stability using Resonance Frequency Analysis (RFA). The small SmartPeg that you attach to the implant has a tiny magnet on top. When the probe sends magnetic pulses, the SmartPeg starts to vibrate – similar to a very small tuning fork.
How it works:

  1. The instrument tip sends magnetic pulses
    These pulses make the SmartPeg vibrate without touching it.
  2. The vibration changes depending on how stable the implant is
    – A stable implant (good bone support) makes the SmartPeg vibrate faster.
    – A less stable implant makes it vibrate slower.
  3. The device converts this vibration into an ISQ value
    – Higher stability → higher frequency → higher ISQ
    – Lower stability → lower frequency → lower ISQ

It takes less than a second, and the ISQ value is shown immediately.

¿Qué debo hacer si no se muestra ningún valor ISQ?

Si no aparece ningún valor ISQ, suele significar que el instrumento no está detectando claramente la vibración del SmartPeg. Hay varios factores que pueden provocar esto, y la mayoría son fáciles de resolver:

  1. La distancia con el instrumento es excesiva
    Normalmente, el instrumento debe mantenerse a 2-4 mm del imán de la parte superior del SmartPeg. No toque el imán. Si no aparece ningún valor, sitúe el instrumento más cerca hasta que se detecte una señal.
  2. Es necesario ajustar el ángulo
    El campo magnético es direccional, por lo que la orientación del instrumento es importante. Las mediciones deben realizarse a un ángulo de aproximadamente 45° respecto a la parte superior del SmartPeg.
  3. Asegúrese de tener el tipo de SmartPeg correcto para el implante específico
    Use este enlace para encontrar el tipo de SmartPeg correcto: Encontrar mi SmartPeg
  4. Amortiguación por tejido blando
    A veces, el tejido circundante puede amortiguar la vibración más de lo previsto. Mantener el instrumento un poco más cerca suele compensar esto.
  5. La plataforma del implante no está limpia
    Asegúrese de que la plataforma del implante está limpia y libre de residuos, de forma que el SmartPeg pueda asentarse correctamente y transmitir su vibración.
  6. El SmartPeg está desgastado o dañado
    • Si utiliza un SmartPeg reutilizable, asegúrese de que se ha inspeccionado antes de usarlo y de que se haya sometido a menos de 20 ciclos de procesamiento. Un SmartPeg reutilizable que esté desgastado, doblado o con roscas dañadas no vibrará correctamente y, por tanto, el instrumento no puede captar ninguna lectura.
    • El SmartPeg de un solo uso está concebido para una única sesión de tratamiento.
    • Asegúrese de que el SmartPeg está correctamente asentado en el implante y de que no esté en contacto con el tejido circundante, ya que esto puede impedir la detección exacta de la señal y dar lugar a un valor ISQ incorrecto o a la imposibilidad de obtenerlo.
  7. Interferencias electromagnéticas
    Las fuentes cercanas de ruido electromagnético intenso pueden alterar la medición. (Para obtener más detalles, consulte las Preguntas frecuentes sobre «Ruido electromagnético»).
¿Usar el instrumento Osstell afecta al implante?

No. La medición con Osstell no afecta al implante. El instrumento solo hace que el SmartPeg vibre. El imán del SmartPeg se activa a causa de los pulsos magnéticos de muy baja intensidad que el instrumento genera. La técnica es objetiva, no invasiva y altamente repetible.

¿Puedo medir el ISQ en un paciente con marcapasos?

Sí, se pueden realizar mediciones de ISQ en pacientes con marcapasos.
Como medida de precaución, la sonda debe mantenerse alejada de la zona del pecho donde se encuentra el marcapasos, debido a los impulsos magnéticos que se emiten durante la medición.
Existen informes publicados sobre los marcapasos y los campos magnéticos a los que se puede recurrir para obtener más información.

¿Cuándo debo medir la estabilidad del implante?

La estabilidad del implante se puede medir en diferentes fases del tratamiento.
Normalmente se mide en el momento de la colocación del implante para establecer un valor de referencia y, posteriormente, durante el proceso de curación, para supervisar los cambios en la estabilidad y la osteointegración. A menudo se realiza una medición final antes de la carga para respaldar la decisión.
Las mediciones repetidas a lo largo del tiempo proporcionan información valiosa, ya que la evolución de los valores ISQ ayuda a orientar las decisiones clínicas.

Osstell Classic

Preguntas sobre Osstell Classic

¿Qué garantía tienen los instrumentos Osstell?

Osstell Beacon: 2 años
W&H Osstell Classic: 1 año

¿Cómo realizo una medición con Osstell Classic?

Antes de utilizar el instrumento en un paciente, coloque una funda protectora sobre él. La funda protectora ayuda a evitar la contaminación cruzada y a impedir que el material dental compuesto se adhiera a la superficie de la punta y del cuerpo del instrumento y que las soluciones de limpieza produzcan manchas y degradación.

Nota

  • Las fundas protectoras son para uso en un solo paciente.
  • Deseche las fundas protectoras usadas en la basura normal después de cada paciente.
  • No deje las fundas protectoras en el instrumento durante periodos prolongados.
  • Consulte las fundas protectoras recomendadas a continuación.
    • TIDIShield, n.° art.: 20808, n.° art.: 20987. tidiproducts.com
    • PremiumPlus: funda del sensor de rayos X 183-2, tamaño 2
  • Después de usarlo en cada paciente, el instrumento debe limpiarse con los productos adecuados.
  • Debe realizarse una primera medición en el momento de la colocación del implante para obtener un valor de referencia para futuras mediciones a lo largo del proceso de curación. Antes de la restauración definitiva, se realiza otra medición que permite observar la evolución de la estabilidad del implante.
  • Se recomienda medir tanto en dirección bucolingual como mesiodistal para encontrar la estabilidad más baja. Por lo tanto, el instrumento solicita al usuario que realice la medición en ambas direcciones.
  • Haga clic aquí para ver un vídeo sobre cómo medir.
¿Cómo se limpia el instrumento?

Antes de cada uso, humedezca una gasa o un paño suave con un limpiador de superficies recomendado (véase la lista más abajo) y limpie todo el instrumento.

Limpiadores aceptables:

  • Alcohol isopropílico al 70 %
  • Detergentes enzimáticos con pH neutro que hagan poca espuma, por ejemplo:
    • Toallitas desinfectantes BePro, REF. 19500102, www.wh.com (se pueden pedir a W&H Sterilization)
    • Medizime LF
    • Enzol

No use:

  • Limpiadores o desinfectantes con base ácida o fenólica
  • Cualquier tipo de detergente alcalino fuerte, incluidos los jabones de manos y lavavajillas
  • Limpiadores con base de lejía
  • Limpiadores con base de peróxido de hidrógeno
  • Limpiadores abrasivos
  • Limpiadores con base de acetona o de hidrocarburo
  • MEK (metiletilcetona)
  • Birex
  • Gluteraldehído
  • Limpiadores con base de sales de cloruro de amonio cuaternario

El instrumento no requiere mantenimiento regular. En caso de avería del instrumento, póngase en contacto con el representante de ventas o distribuidor local para obtener más instrucciones.

How do I measure and record ISQ on an abutment?

You can record ISQ at abutment level in OsstellConnect, but it is important to follow the correct clinical measurement procedure to obtain accurate values.

How to measure ISQ at abutment level

  1. Perform an implant level measurement first, before placing the abutment.
  2. Measure again at abutment level during the same session, using a SmartPeg made for abutment level measuring.
  3. Determine the offset by noting the difference between implant level and abutment level ISQ. This offset remains stable throughout healing and should be used when interpreting follow-up measurements.
  4. For all subsequent visits, measure on the abutment and apply the same offset to understand the true implant ISQ.

How to record the measurement in OsstellConnect:

  1. Go to the patient’s register, select the patient and the implant in the tooth chart. Click ‘Add abutment’, choose the abutment, and save.
  2. Select ‘Measure stability’ and choose ‘Abutment’ under Measurement level. Measure on the abutment as you would at implant level and save.
  3. To review the stability trend, open the Stability tab and toggle ‘Show abutment’. You can also enable ‘Show details’ to view buccal–lingual and mesial–distal ISQ values.

For a more detailed explanation and clinical guidance, see our blog post here.

How can I find the serial number (SN)?

You can find the serial number on the back of your instrument.

¿Por qué al medir obtengo valores inesperados o no consigo ninguna lectura?

Algunas posibles explicaciones son:


SmartPeg reutilizado: Los SmartPegs son desechables y solo deben utilizarse para una o varias mediciones en una sesión de tratamiento, para un solo paciente. La reutilización repetida puede dar lugar a lecturas falsas debido al desgaste de las roscas blandas de aluminio del SmartPeg.

Tipo de SmartPeg incorrecto seleccionado para el implante: Consulte la lista de referencia de SmartPeg, osstell.com/smartpegguide

Hueso o tejido blando entre SmartPeg e implante: Asegúrese de limpiar la conexión protésica del implante antes de colocar el SmartPeg.

Interferencias electromagnéticas: Retire la fuente de las interferencias electromagnéticas.

La sonda está demasiado lejos del SmartPeg: Sostenga la sonda a 2-4 mm del SmartPeg.

Why do I need to take two measurements at the same occasion?

ISQ should always be measured in two directions, because implant stability can vary depending on the amount of surrounding bone in different directions. Measuring from two angles ensures that both the most and the least stable directions are captured.
To do this, take one measurement in the buccal-lingual direction and one in the mesial-distal direction. These two ISQ values represent the different stability directions. Sometimes the values are identical; sometimes they differ.
If the two measurements differ, always rely on the lowest ISQ value, as it reflects the weakest direction and therefore provides the most clinically relevant information about implant stability.

¿Hay estudios que demuestren el método de Osstell?

Actualmente existen miles de artículos publicados en revistas científicas en los que se han utilizado instrumentos Osstell en el estudio. Estos resúmenes se pueden encontrar en nuestra base de datos de búsqueda en «Resources/Scientific database» (Recursos/Base de datos científica).

La escala ISQ de Osstell se basa en los resultados de estos estudios, todos ellos realizados con instrumentos de Osstell y SmartPegs de aluminio.

How does the Osstell technology work?

Osstell measures implant stability using Resonance Frequency Analysis (RFA). The small SmartPeg that you attach to the implant has a tiny magnet on top. When the probe sends magnetic pulses, the SmartPeg starts to vibrate – similar to a very small tuning fork.
How it works:

  1. The instrument tip sends magnetic pulses
    These pulses make the SmartPeg vibrate without touching it.
  2. The vibration changes depending on how stable the implant is
    – A stable implant (good bone support) makes the SmartPeg vibrate faster.
    – A less stable implant makes it vibrate slower.
  3. The device converts this vibration into an ISQ value
    – Higher stability → higher frequency → higher ISQ
    – Lower stability → lower frequency → lower ISQ

It takes less than a second, and the ISQ value is shown immediately.

¿Qué debo hacer si no se muestra ningún valor ISQ?

Si no aparece ningún valor ISQ, suele significar que el instrumento no está detectando claramente la vibración del SmartPeg. Hay varios factores que pueden provocar esto, y la mayoría son fáciles de resolver:

  1. La distancia con el instrumento es excesiva
    Normalmente, el instrumento debe mantenerse a 2-4 mm del imán de la parte superior del SmartPeg. No toque el imán. Si no aparece ningún valor, sitúe el instrumento más cerca hasta que se detecte una señal.
  2. Es necesario ajustar el ángulo
    El campo magnético es direccional, por lo que la orientación del instrumento es importante. Las mediciones deben realizarse a un ángulo de aproximadamente 45° respecto a la parte superior del SmartPeg.
  3. Asegúrese de tener el tipo de SmartPeg correcto para el implante específico
    Use este enlace para encontrar el tipo de SmartPeg correcto: Encontrar mi SmartPeg
  4. Amortiguación por tejido blando
    A veces, el tejido circundante puede amortiguar la vibración más de lo previsto. Mantener el instrumento un poco más cerca suele compensar esto.
  5. La plataforma del implante no está limpia
    Asegúrese de que la plataforma del implante está limpia y libre de residuos, de forma que el SmartPeg pueda asentarse correctamente y transmitir su vibración.
  6. El SmartPeg está desgastado o dañado
    • Si utiliza un SmartPeg reutilizable, asegúrese de que se ha inspeccionado antes de usarlo y de que se haya sometido a menos de 20 ciclos de procesamiento. Un SmartPeg reutilizable que esté desgastado, doblado o con roscas dañadas no vibrará correctamente y, por tanto, el instrumento no puede captar ninguna lectura.
    • El SmartPeg de un solo uso está concebido para una única sesión de tratamiento.
    • Asegúrese de que el SmartPeg está correctamente asentado en el implante y de que no esté en contacto con el tejido circundante, ya que esto puede impedir la detección exacta de la señal y dar lugar a un valor ISQ incorrecto o a la imposibilidad de obtenerlo.
  7. Interferencias electromagnéticas
    Las fuentes cercanas de ruido electromagnético intenso pueden alterar la medición. (Para obtener más detalles, consulte las Preguntas frecuentes sobre «Ruido electromagnético»).

¿Usar el instrumento Osstell afecta al implante?

No. La medición con Osstell no afecta al implante. El instrumento solo hace que el SmartPeg vibre. El imán del SmartPeg se activa a causa de los pulsos magnéticos de muy baja intensidad que el instrumento genera. La técnica es objetiva, no invasiva y altamente repetible.

¿Puedo medir el ISQ en un paciente con marcapasos?

Sí, se pueden realizar mediciones de ISQ en pacientes con marcapasos.
Como medida de precaución, la sonda debe mantenerse alejada de la zona del pecho donde se encuentra el marcapasos, debido a los impulsos magnéticos que se emiten durante la medición.
Existen informes publicados sobre los marcapasos y los campos magnéticos a los que se puede recurrir para obtener más información.

¿Cuándo debo medir la estabilidad del implante?

La estabilidad del implante se puede medir en diferentes fases del tratamiento.
Normalmente se mide en el momento de la colocación del implante para establecer un valor de referencia y, posteriormente, durante el proceso de curación, para supervisar los cambios en la estabilidad y la osteointegración. A menudo se realiza una medición final antes de la carga para respaldar la decisión.
Las mediciones repetidas a lo largo del tiempo proporcionan información valiosa, ya que la evolución de los valores ISQ ayuda a orientar las decisiones clínicas.

Comprender la osteointegración en odontología

Comprender la osteointegración en odontología

¿En qué consiste un implante osteointegrado?

Un implante dental osteointegrado es un implante que se ha unido al hueso circundante y proporciona una base estable para los dientes protésicos, que permanece segura con el paso del tiempo. 1 2

¿Cómo funciona la osteointegración en odontología?

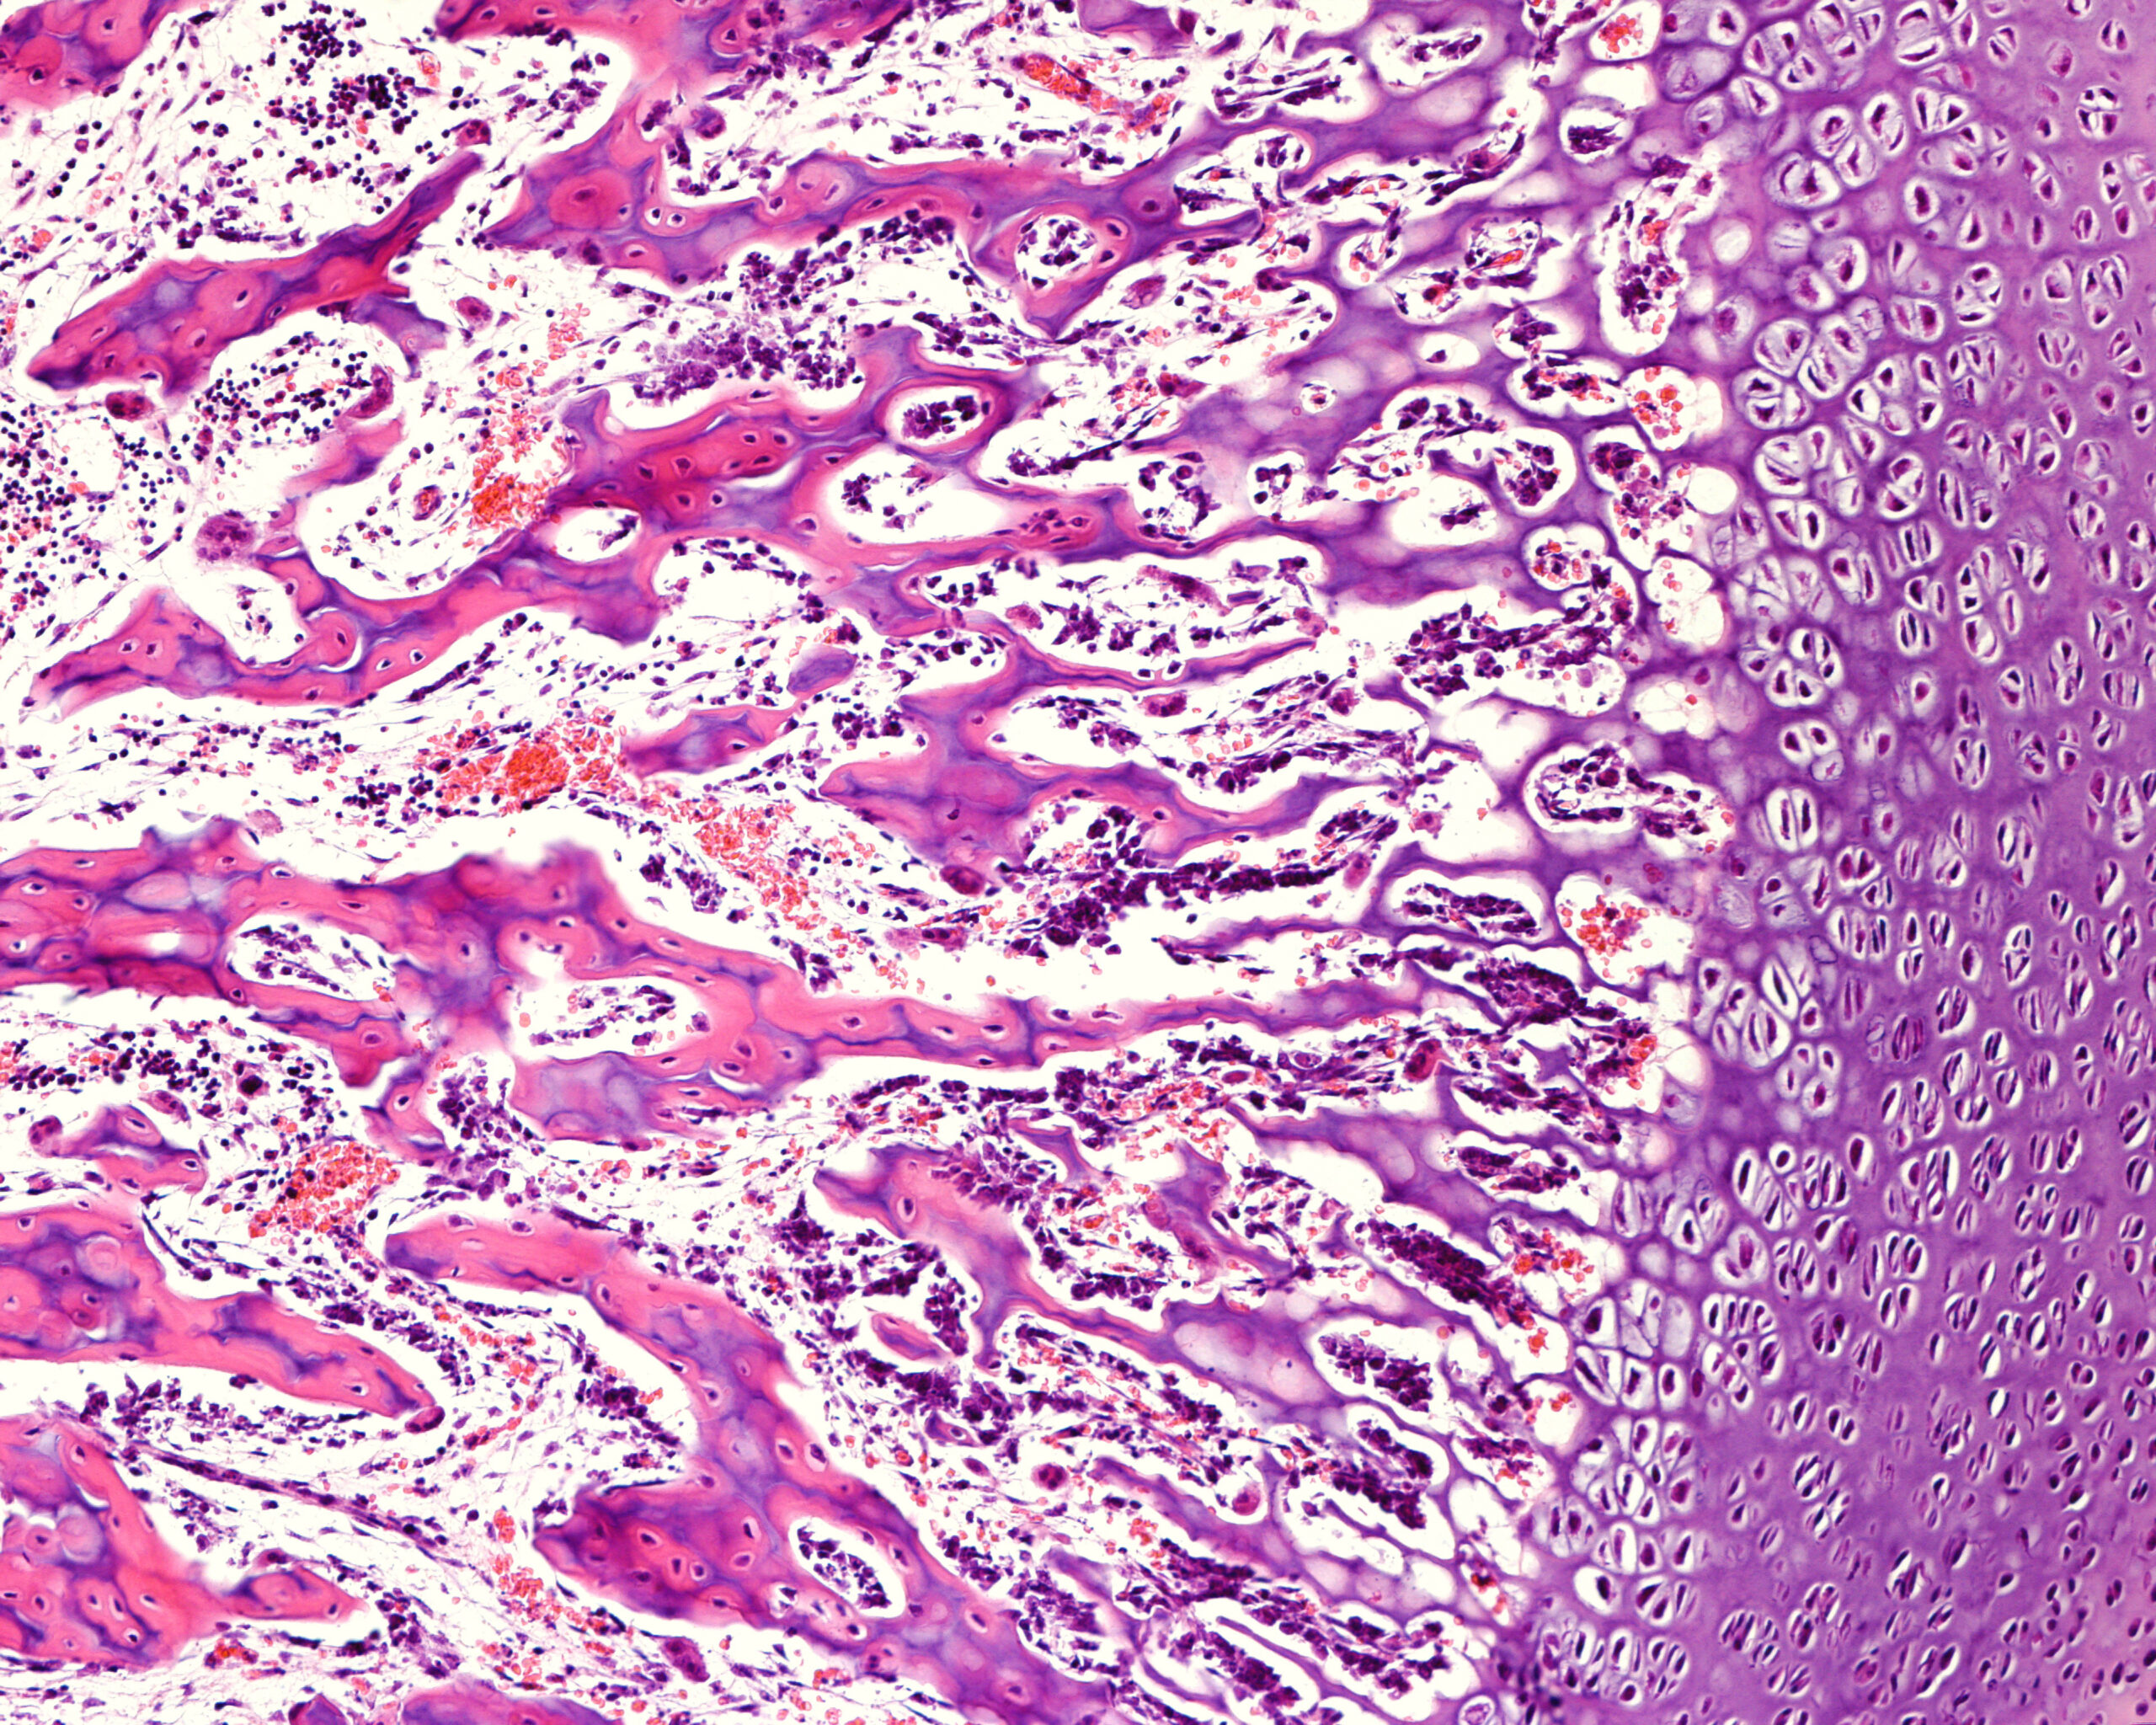
Durante la osteointegración, las células óseas circundantes se unen a la superficie del implante, pasando de la estabilidad mecánica a la biológica con el tiempo. 1 3

¿Cuál es la definición de osteointegración en los implantes dentales?

La osteointegración es la conexión directa y funcional entre el hueso vivo y la superficie de un implante. Es un factor crítico para garantizar la estabilidad y el éxito de los implantes dentales. 1 2

¿Cuándo debo medir la estabilidad del implante?

La estabilidad del implante se puede medir en diferentes fases del tratamiento.
Normalmente se mide en el momento de la colocación del implante para establecer un valor de referencia y, posteriormente, durante el proceso de curación, para supervisar los cambios en la estabilidad y la osteointegración. A menudo se realiza una medición final antes de la carga para respaldar la decisión.
Las mediciones repetidas a lo largo del tiempo proporcionan información valiosa, ya que la evolución de los valores ISQ ayuda a orientar las decisiones clínicas.

Questions about the Osstell IDx

Questions about the Osstell IDx

How do I measure and record ISQ on an abutment?

You can record ISQ at abutment level in OsstellConnect, but it is important to follow the correct clinical measurement procedure to obtain accurate values.

How to measure ISQ at abutment level

  1. Perform an implant level measurement first, before placing the abutment.
  2. Measure again at abutment level during the same session, using a SmartPeg made for abutment level measuring.
  3. Determine the offset by noting the difference between implant level and abutment level ISQ. This offset remains stable throughout healing and should be used when interpreting follow-up measurements.
  4. For all subsequent visits, measure on the abutment and apply the same offset to understand the true implant ISQ.

How to record the measurement in OsstellConnect:

  1. Go to the patient’s register, select the patient and the implant in the tooth chart. Click ‘Add abutment’, choose the abutment, and save.
  2. Select ‘Measure stability’ and choose ‘Abutment’ under Measurement level. Measure on the abutment as you would at implant level and save.
  3. To review the stability trend, open the Stability tab and toggle ‘Show abutment’. You can also enable ‘Show details’ to view buccal–lingual and mesial–distal ISQ values.

For a more detailed explanation and clinical guidance, see our blog post here.

How can I update the software of my Osstell IDx?

Navigate to your clinic in your account. Select the instrument tab. Click on Download firmware.
Download instructions:

• Wait for the download to complete (could take a while depending on your connection)

• Copy the .m2f binary file to a USB memory stick

• Insert the memory stick in your IDx while it is running

• Follow instructions on the IDx display

Note: you cannot open or view the .m2f file
You can also check this guide

How can I find my registration code?

Osstell Beacon
• To find your registration code, please make sure that you have already installed the Beacon Gateway. If you have not installed it yet, please navigate to your clinic in your account, click the instruments tab and download the gateway. Install it.
• Take your instrument in hand. It is now connecting to OsstellConnect and you should see a symbol animating. Please note that it can take a few seconds.
• When connected, the symbol stops animating.
• The registration code is now displayed on the lower screen of your instrument.

Osstell IDx
• When turning on your Osstell IDx for the first time, you will be prompted to select language, time zone, date and time.
• After that, you will need to set up a 4-digit pin code and a backup password. The backup password is needed when restoring to a backup, so please note it down and save it in a safe place.
• Your registration code is now displayed on your Osstell IDx.

What is the warranty on IDx?

Two years.

Why do I need to set the date and time again?

The IDx continues to consume a small amount of power even when switched off. If the battery becomes fully depleted (0%), the stored date and time settings will be lost.
When this happens, you will be prompted to set the date and time again at start-up.

If your IDx is connected to the internet, the date and time will be set automatically.

Why do I sometimes get an electromagnetic noise warning when I approach the SmartPeg with the probe?

An electromagnetic noise warning indicates the presence of an external or internal magnetic disturbance that may affect the measurement.
This can occur due to nearby electronic equipment, or if the probe is held very close to the instrument itself.

Why do I need to take two measurements at the same occasion?

ISQ should always be measured in two directions, because implant stability can vary depending on the amount of surrounding bone in different directions. Measuring from two angles ensures that both the most and the least stable directions are captured.
To do this, take one measurement in the buccal-lingual direction and one in the mesial-distal direction. These two ISQ values represent the different stability directions. Sometimes the values are identical; sometimes they differ.
If the two measurements differ, always rely on the lowest ISQ value, as it reflects the weakest direction and therefore provides the most clinically relevant information about implant stability.

How do I get started?

Register your IDx by following the instructions in the device or by following this link.

How does the Osstell technology work?

Osstell measures implant stability using Resonance Frequency Analysis (RFA). The small SmartPeg that you attach to the implant has a tiny magnet on top. When the probe sends magnetic pulses, the SmartPeg starts to vibrate – similar to a very small tuning fork.
How it works:

  1. The instrument tip sends magnetic pulses
    These pulses make the SmartPeg vibrate without touching it.
  2. The vibration changes depending on how stable the implant is
    – A stable implant (good bone support) makes the SmartPeg vibrate faster.
    – A less stable implant makes it vibrate slower.
  3. The device converts this vibration into an ISQ value
    – Higher stability → higher frequency → higher ISQ
    – Lower stability → lower frequency → lower ISQ

It takes less than a second, and the ISQ value is shown immediately.

How long is the battery life of the Osstell IDx?

For normal use, the batteries last for at least one day but in most cases longer. It takes about 2 hours to charge the IDx from a fully discharged state.

How do I perform a measurement?

Choose a tooth position on the touch screen and start measuring.

How do I add patient information?

Perform measurements, press End patient, and then save as Add new patient.

How do I edit patient information?

Simply select the pen symbol in the patient list to edit.

How can I save patient data?

The patient data can be saved either in the instrument or in OsstellConnect.

How can I delete ISQ values (e.g. in case I have accidentally measured twice from the same direction)?

Values can only be removed before saving clicking on the trash bin symbol. After saving the data cannot be modified.

Is the IDx Portal both Windows and Mac compatible?

Yes, OsstellConnect is accessible via iPhone, iPad, Mac or PC.

Why is the instrument locked?

Have you registered your device? You can only use the Osstell IDx for a limited time without registration.

Which Osstell products can be autoclaved?

The following products may be autoclaved (over-pressurized steam up to 135 deg Celsius):

  • SmartPeg Mount
  • Reusable SmartPeg
  • Probe (IDx)

Please note that single-use SmartPegs are disposable and cannot be autoclaved!

Why do I need a backup code?

To enable automatic backup of your Osstell IDx, you will be asked to create a backup code made up of 8 characters. The purpose of the backup is to reset the unit if you for some reason remove patients by mistake or lose your instrument. The code is created during the registration process and you only have to enter it once. To make sure you can access your backup at a later date, it is VERY important that you write this code down and keep it in a safe place.

Backup can also be done via USB without a code.

Questions about Osstell and the ISQ scale

Questions about Osstell and the ISQ scale

What is an ISQ value?

ISQ (Implant Stability Quotient) is a numerical value from 1 to 99 that describes implant stability. It is calculated from the resonance frequency measured when the Osstell instrument sends a magnetic pulse to a SmartPeg attached to the implant, translating this into a clinically intuitive value.


What ISQ value should I have before loading?

There is no single ISQ value that determines when an implant can be loaded. The decision depends on the stability over time (the ISQ trend), as well as clinical judgement and patient-specific risk factors.
As a general guideline, higher ISQ values provide greater confidence, and values around 70 or above are often considered suitable for loading non-splinted implants. For splinted restorations, lower values may be acceptable.
For guidance on how to interpret ISQ values, see the Osstell ISQ Scale.

Why do I need to take two measurements at the same occasion?

ISQ should always be measured in two directions, because implant stability can vary depending on the amount of surrounding bone in different directions. Measuring from two angles ensures that both the most and the least stable directions are captured.
To do this, take one measurement in the buccal-lingual direction and one in the mesial-distal direction. These two ISQ values represent the different stability directions. Sometimes the values are identical; sometimes they differ.
If the two measurements differ, always rely on the lowest ISQ value, as it reflects the weakest direction and therefore provides the most clinically relevant information about implant stability.

There is no single ISQ value that determines suitability for immediate loading. In addition to the ISQ value, the decision depends on primary stability, clinical judgement, and patient-specific risk factors.
As a general guide, higher ISQ values indicate greater stability, and values around 70 or above may support immediate loading in appropriate cases.
For guidance on interpreting ISQ values, see the Osstell ISQ Scale.

What does Osstell measure?

Osstell measures the lateral stability of the implant and thereby indirectly the degree of osseointegration. The results are presented as an ISQ, ranging from 1-99 ISQ, which correlates to micro mobility.

How does the Osstell technology work?

Osstell measures implant stability using Resonance Frequency Analysis (RFA). The small SmartPeg that you attach to the implant has a tiny magnet on top. When the probe sends magnetic pulses, the SmartPeg starts to vibrate – similar to a very small tuning fork.
How it works:

  1. The instrument tip sends magnetic pulses
    These pulses make the SmartPeg vibrate without touching it.
  2. The vibration changes depending on how stable the implant is
    – A stable implant (good bone support) makes the SmartPeg vibrate faster.
    – A less stable implant makes it vibrate slower.
  3. The device converts this vibration into an ISQ value
    – Higher stability → higher frequency → higher ISQ
    – Lower stability → lower frequency → lower ISQ

It takes less than a second, and the ISQ value is shown immediately.

What is the difference between RFA and DCA (Periotest) measurements?

Periotest (DCA) measurements are designed for natural teeth, which are connected to the bone via the periodontal ligament. In contrast, dental implants are anchored directly to the bone without a periodontal ligament.
RFA measurements using Osstell instruments assess implant stability by measuring the stiffness of the bone–implant interface. They provide an objective and repeatable value on a more sensitive scale, supporting reliable assessment over time.

What is the difference between ISQ and BIC?

ISQ and BIC measure different aspects of implant integration.
BIC (bone-to-implant contact) describes the percentage of the implant surface in contact with bone at a microscopic level, while ISQ reflects implant stability by measuring the stiffness of the bone–implant interface.

As a result, high BIC does not always mean high stability, as bone quality and stiffness also play a key role.

For a more detailed explanation, see: How ISQ correlates to torque

Does the way the SmartPeg is tightened affect the ISQ value?

Yes. The ISQ value can be affected if the SmartPeg is not mounted correctly.

For accurate measurements, the SmartPeg should be attached finger tight using the SmartPeg Mount, which corresponds to about 4–6 Ncm.

At this level, the SmartPeg has firm, stable contact with the implant, and the resulting ISQ value is consistent – typically within ±2 ISQ units.

  • If the SmartPeg is not fully seated:
    The contact becomes unstable, and the ISQ value can appear artificially low, or you don’t receive any value.
  • If too much force is applied:
    Overtightening does not improve accuracy. It may damage the SmartPeg threads.
    – A reusable SmartPeg may be damaged so it cannot be used again.
    – A single use or reusable SmartPeg may have its threads deformed, which can lead to inaccurate measurements during that session or, in worst case a broken SmartPeg.

In short: finger tight (4–5 Ncm) is enough to ensure stable contact and reliable ISQ readings.

What is the lowest ISQ value typically observed?

Clinically, the lowest ISQ values typically seen are around 40.

If the stability is below 30, the implant is generally considered to have very low stability or to be loose. It may also indicate that the SmartPeg is not correctly mounted on the implant.

Very low values (below 20) are rarely seen in clinical situations and are more commonly observed in laboratory models with artificially low stability.